Product Finder
Indoors
Outdoors

Contact Form

Keep the pests at bay and strengthen your doors Insider secrets to using silicone sealant to protect and seal your doors

Note: This article is provided as a general guide and is not intended to replace product-specific installation procedures; always follow applicable manufacturer’s instructions. Depending on your home’s age and condition, location within the home, and other potential factors, repairs and/or upgrades or other services may be necessary before the beginning and/or completion of your project that may involve the services of a home improvement professional. This article does not include advice about local building codes or related inspections.

A doorway welcomes friends and family to your home, but it shouldn’t welcome pests, moisture, and mould. It should be an entryway for those you care about and the first line of defense against unwelcome weather and bugs. By using door sealant, you can protect your home and its insides by sealing small gaps that can quickly become big problems.

We bring you our favourite products for sealing doors, plus tips the pros use to ensure an airtight seal.

Where to apply door sealant for maximum protection

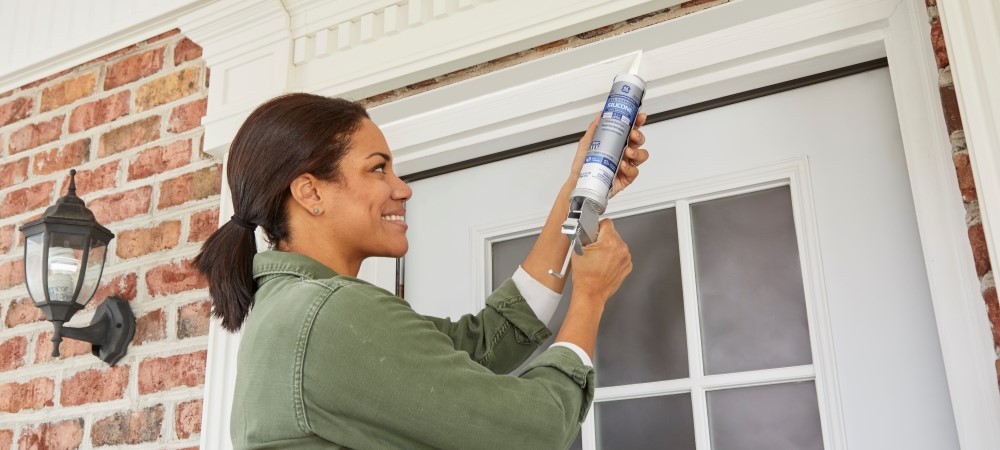
Silicone sealant goes on door frames after installation. You can place it between the frame and the wall to give the frame an extra secure seal. You apply the sealant for doors to both the interior and exterior sides of the door      .

If in doubt, ask yourself whether there’s a gap or if there is potential for a gap. If there is, you most likely need sealant, such as around a      door frame.

The exception would be the door itself. Your door would not use silicone sealant since it needs an easy range of motion. That’s why you would use a weather strip. A weather strip forms a seal when the door is closed but can move with it when it’s open.

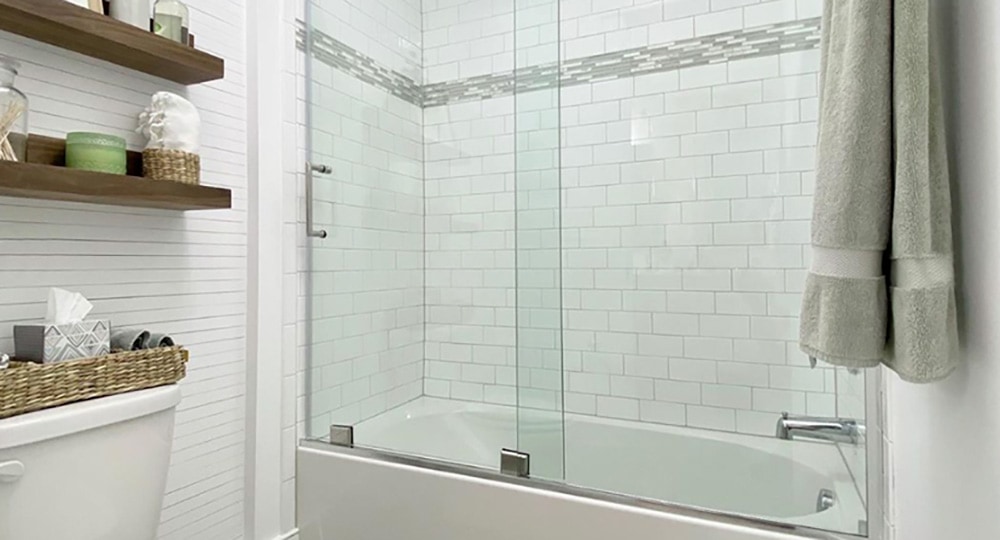
If your door has windows, you may want to use silicone sealant to fill in any gaps those windows might leave for air seeping in, mould growth, and pests.

How door sealant protects your frame and door

Do you need to use front door sealant on your house?

That decision is ultimately yours, but here are the benefits you’ll gain by using a door frame sealant.

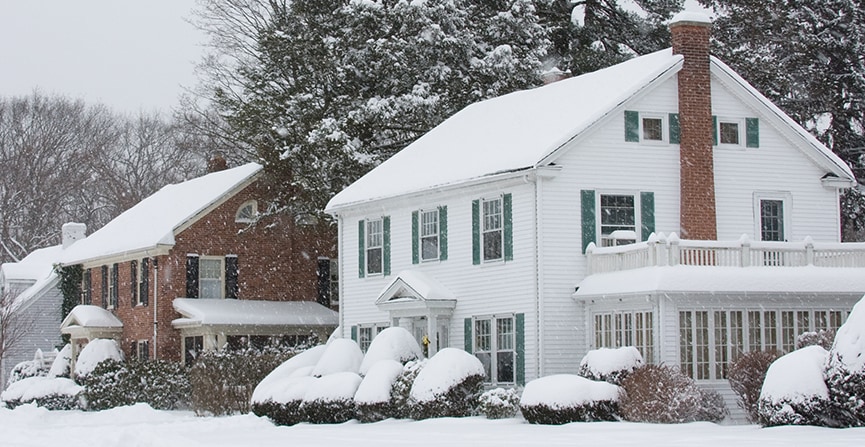
  • Moisture resistance: One of the most significant benefits of sealing your door is preventing moisture buildup. No matter how small, the gap between your frame and wall can capture moisture, especially on the outside. Over time, that moisture will turn to mould, which can cause much more extensive damage.
  • UV protection: Sunlight tends to degrade materials over time. Sealants can prevent some sun damage, especially around the edges and cracks where the frame is already weak.
  • Temperature protection: Materials can also grow or shrink as temperatures change. This is often a cause of cracking. A flexible silicone sealant moves with the door frame, holding it secure and supporting it through temperature fluctuations, minimizing the cracks that otherwise result.
  • Aesthetic preservation: Sealed doors look more aesthetic than unsealed doors. You can fill in unsightly gaps and smooth the transition from frame to door. This seal keeps the door looking well-maintained and aesthetic for longer.
  • Pest protection: While that small gap may seem insignificant, that’s all it takes for pests to enter your home.  Bugs, such as ants, or mice will find any gaps, especially around doors, to invade your home. You can keep out more of those pests from your home by sealing those gaps.

Sealing your door’s interior and exterior frame prevents moisture damage, protects against UV damage, supports the frame during temperature changes, keeps out pests, and improves your door’s aesthetic.

5 steps to apply door sealant that will last

Follow these five steps to apply door sealant like a pro.

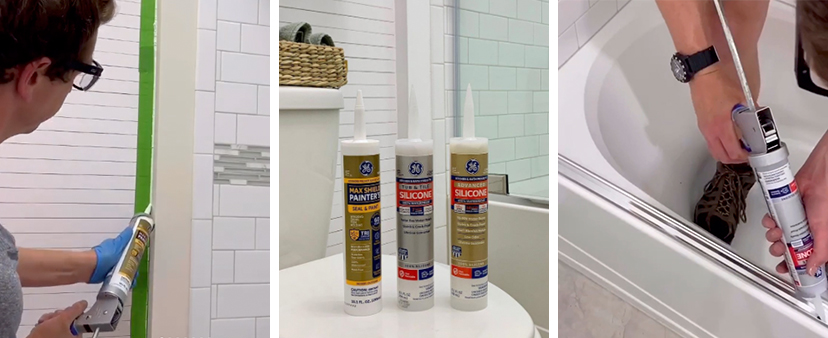
  1. Choose the right sealant

    Not all sealants are the same. Pros carefully choose the best sealant for their surface and desired results.

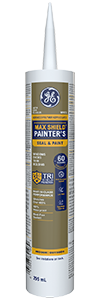
    In this case, because the sealant goes outside in addition to inside, you will want a weather-resistant sealant for door frames. You will also want a sealant compatible with materials commonly found on door frames, especially if you have windows in the door you also plan to seal.

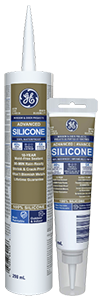
    GE sealant’s Supreme Silicone Window & Door sealant checks all the boxes. It’s durable, weatherproof, and has a lifetime of mould-free protection. Due to its extra flexibility, it lasts longer and can change with extreme Canadian temperatures.

    Because it is a silicone sealant, you can’t paint over it. However, it comes in six colours, matching your door and frame for a quality finish. It can even adhere to high-end metal finishes like chrome, bronze, and nickel.

  2. Prepare the surface

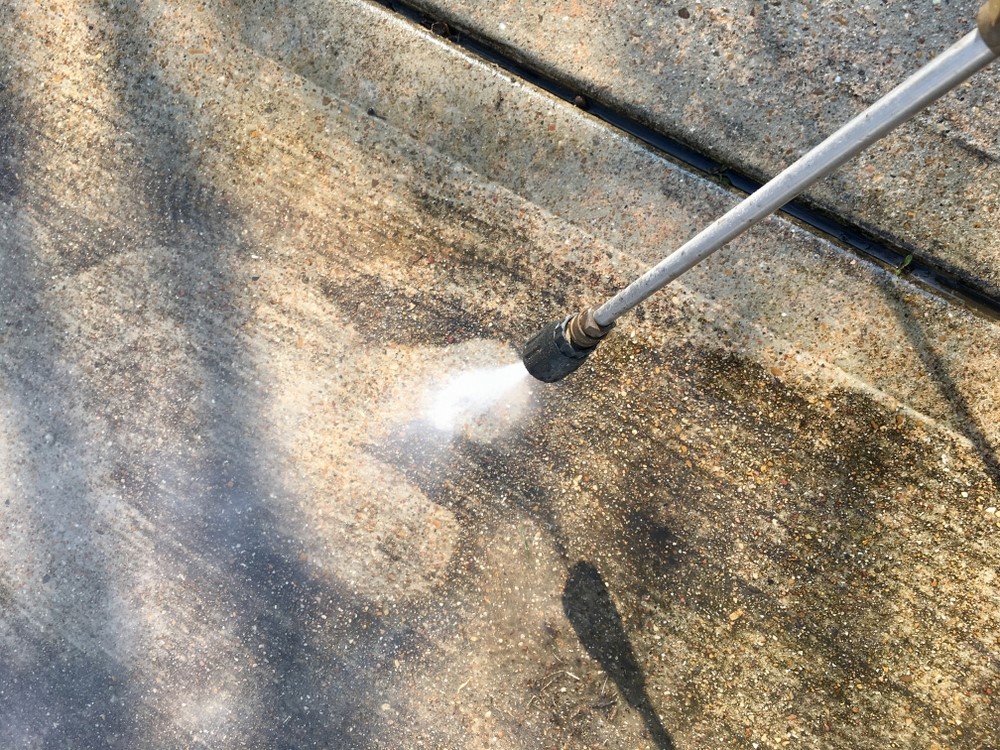
    Before jumping right into applying the door silicone sealant, take time to clean the surface area. You want to remove dirt and grime that might compromise the sealant’s adhesion. You will also remove old paints, varnishes, and silicone.

    If you have a wooden door frame, we recommend sanding it down if it has any coatings that might prevent the sealant from fully adhering to the door frame.

    You will then wait till the surface is completely dry after cleaning before beginning your sealant process.

    You may want to apply painter’s tape on areas you don’t want to accidentally drip sealant on, such as hardware or glass panels. It also helps keep a straight, clean line around the frame.
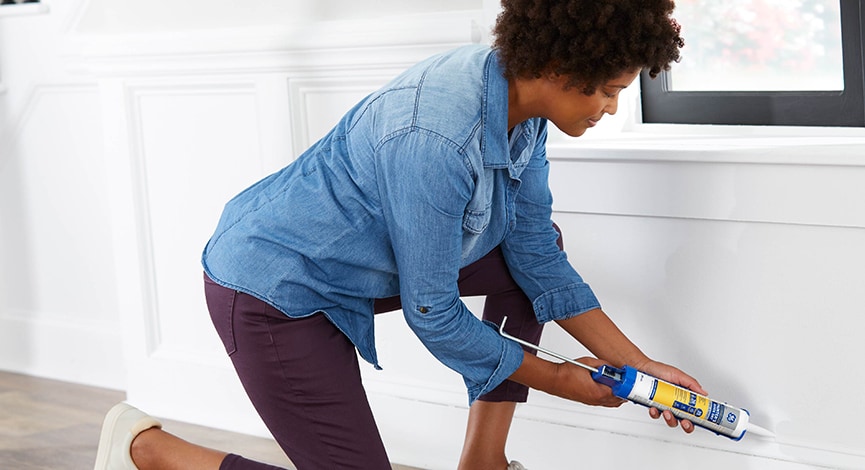
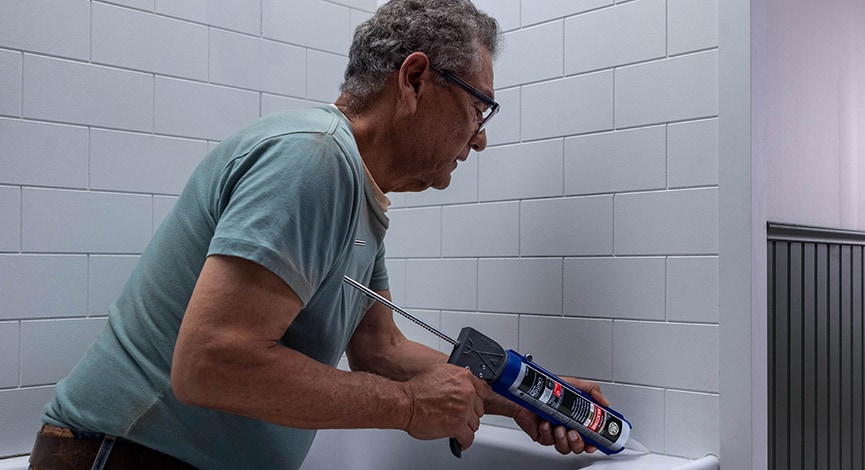
  3. Apply the sealant

    To open your door sealant, cut at an angle. The angled cut provides more control over the bead. How high up the tube you cut determines how thick the bead is.

    After cutting the tip, puncture the inner seal.

    A door frame is a big job and may require some reaching. Using a cartridge in a caulk gun will give you the best grip and results.

    Apply the silicone door sealant in a small, steady bead the size of the gap you are sealing. After applying the bead, run a gloved finger across it to help it fully adhere.

  4. Allow ample time to dry

    Silicone sealant has varying dry times, so always check your brand’s specific dry time.

    A quality sealant like GE helps protect your door by being rain-ready in just 30 minutes. You don’t need to sweat the weather, even as the sealant cures as rain won’t hurt it after that thirty-minute mark. Its total cure time is about 24 hours. After that time, it has reached its maximum strength.

  5. Regularly maintain the area

    Because door frame sealant is exposed to the elements, it will degrade over time. Quality sealants may last the lifetime of the door.

    To help prolong the sealant’s lifespan, inspect the door for damage and grime buildup. If there is dirt building up, clean the area thoroughly. If you need to reapply the sealant, remove the old sealant first before adding the new one.

Is your door frame ready for all types of weather and pests? Seal those small gaps before they become large, costly repairs to enjoy your warm, safe home interior. GE sealant wards off any pest outside your door that threatens to disrupt that peace.

Find a store near you that carries GE sealant’s silicone door sealant.

Contact Form

Tap into the strength of silicone concrete sealant The best sealant for concrete that will survive Canadian weather

Note: This DIY article is provided as a general guide only and is not intended to take the place of product-specific installation procedures; always follow applicable manufacturers’ instructions. Depending on your home’s age and condition, location within the home, and other potential factors, repairs and/or upgrades or other services may be necessary prior to the beginning and/or completion of your project that may involve the services of a home improvement professional. This article does not include advice pertaining to local building codes and/or any related inspections.

Canadian weather loves to throw the unexpected your way. You can experience sweltering summers or freezing winters. While preparing your home for weather and life, show your concrete some attention. Your concrete often holds together crucial parts of your home or is a central walkway. Adding sealant for concrete gives the area extra protection against the elements while increasing its durability and lifespan.
Learn the many benefits of concrete sealant and tips for adequately applying it around your home.

What makes concrete sealant unique?

Concrete sealant is specifically designed to improve the longevity of concrete. It fills gaps in the concrete to prevent moisture damage from rain and the elements. The best sealant is silicone, which can move, expand, and contract with the concrete.

Not all silicone sealant works with concrete. Look for silicone sealant formulated to bond with concrete to ensure it cures appropriately, such as GE’s concrete silicone sealant. This sealant offers several benefits to your concrete, including:

  • Weatherproofing: Protecting your concrete from the elements, extending its life
  • Mould protection: Offering 10-year mould-free protection
  • UV protection: It won’t crack or break down in the sunlight

30-minute rain-ready: Can handle the elements within 30 minutes from the application

Concrete sealant fills gaps in the concrete to prevent moisture damage from rain and the elements.

Where can you use a concrete sealant?

Concrete sealant works for most concrete surfaces, such as sidewalks, driveways, and porches. You can use it for minor repairs and sealing if you have cinder blocks or chimney issues.

Concrete sealant also works on several non-concrete surfaces around your home, such as:

  • Brick
  • Stone
  • Stucco
  • Masonry
  • Asphalt
  • Metal
  • Wood
  • Aluminum
  • And more

Before sealing an area, test the concrete sealant on a small space to ensure it appropriately cures. If the area has a galvanized surface or special coatings, it may not properly cure.

Where should you avoid using concrete sealant?

While sealant for concrete has flexible uses, it also has several limitations. Because it’s made from silicone, avoid using it in any area where you will paint over it. Painting over silicone sealant will lead to cracking unless you use a sealant explicitly designed for paint.

Concrete sealant has chemicals that make it unsafe for surfaces in contact with food. It is also not built for continuous water exposure, so avoid using it underwater or in aquariums.

5 tips for applying concrete sealant

Follow these five tips for applying a concrete sealant to experience its full benefits.

  1. Thoroughly prepare the area

    Before jumping into your sealing job, properly prepare the area. You will want to clean where you plan to apply sealant. This removes debris, mould, and bacteria. If you already have sealant on the concrete, remove the old sealant during this process.

    Once the area is clean, allow it to dry before beginning the application process. Trapped moisture can prevent the sealant from fully adhering to the surface.

    For the best results, only apply the sealant if it’s above freezing (0 degrees Celsius). If the weather is too cold, the sealant will take longer to cure. GE recommends keeping the sealant and area at 21 degrees Celsius.

  2. Use a caulking gun for accurate application

    Concrete sealant comes in cartridges that work in a caulking gun. Before loading it, cut the nozzle to your desired size at a 45-degree angle, measuring it based on the smallest crack. You can adjust your bead size further by adding more pressure to your caulking gun.

    After cutting the nozzle, use the caulking gun to pierce the inner foil of your concrete sealant cartridge.

    Because the sealant begins to dry within minutes, avoid cutting the sealant until you’re ready to seal your concrete.

  3. Store unused concrete sealant

    You may not use a full sealant cartridge in one job. After you finish, properly storing your concrete sealant allows you to use it again. The shelf life of GE’s concrete sealants is 18 months after storing it unopened.

    The shelf life begins to decrease once you expose the sealant to air. The more air in the tube, the shorter its shelf life.

    To eliminate the most air and extend its shelf life, squeeze the remaining concrete sealant toward the nozzle opening, pushing the air out of the tube. Seal the tube with a nail or cap. Plastic wrap can also create a secure seal in a pinch.

    Once you reseal the tube, store it upside down to prevent new air from coming into the tube. Use the remaining concrete sealant as soon as possible to prevent it from drying out.

  4. Maintain your sealant

    If you properly apply the concrete sealant, it will help protect your concrete. However, you are responsible for preserving the sealant to extend its life and increase your concrete’s protection.

    There are many situations in which a high-quality concrete sealant can withstand wear and tear. For example, GE’s sealant protects against:

    • Water damage
    • UV exposure
    • Mould

    To keep it strong, avoid using strong chemicals, primarily paint thinners and isopropyl alcohol, as these chemicals can dissolve silicone sealant. Regularly wash the area using a pressure washer or other means to prevent mould build-up on top and around the sealant that might shorten its lifespan.

  5. Remove concrete sealant with care

    Concrete sealants have varying lifespans. With proper care, GE’s concrete sealant will last nearly ten years on average. When it’s time to replace the sealant, you will want to first remove all the old concrete sealant.

    Start by  scraping off as much sealant as possible using a steel brush or knife. Move slowly as you want to avoid scratching up the surface around the sealant.

    While you shouldn’t expose the sealant to chemicals during cleaning, now is the time to break out those chemicals that will help remove the sealant. First, test the chemical in a small discreet area to watch how it reacts to the surrounding areas. If there are any coatings on the concrete, stick with scraping the sealant out and avoid chemicals.

    Once you thoroughly remove the old sealant, you are ready to add fresh sealant that will breathe new life into your home.

Protect your home this year against Canadian weather, wear and tear, and mould growth by using sealant for concrete to increase its durability. Find a store near you that carries GE concrete sealant.

Contact Form

Philip or Flop Talks Importance of Sealing Shower Doors

The project discussed in this post is sponsored by the makers of GE Sealants & Adhesives.

For his most recent project collaboration with GE Sealants & Adhesives, Philip, from Philip or Flop, gave his kids’ jack-and-jill bathroom a stunning makeover. He not only updated its style with a new sliding glass shower door, wall paneling, and toilet, but he also used a range of GE-branded sealants to get his project done right.


Since his brand-new shower door is located in an area prone to water exposure, Philip sealed the area underneath the door’s threshold and along the inside edge of the shower enclosure with Tub & Tile Silicone 1 sealant to protect the project area from shower leaks. This sealant is 100% silicone, offering a 100% waterproof seal with 7-year mold-free product protection and permanent flexibility. In addition, Tub & Tile Silicone 1 sealant was ready that same day for water exposure and offered strong adhesion and durability.

Want to know more about Philip’s project details? Check out his blog post for his bathroom renovation play-by-play.

Contact Form

Important Steps to Winterize Your Home

Note: This DIY article is provided as a general guide only and is not intended to take the place of product-specific installation procedures; always follow applicable manufacturers’ instructions. Depending on your home’s age and condition, location within the home, and other potential factors, repairs and/or upgrades or other services may be necessary prior to the beginning and/or completion of your project that may involve the services of a home improvement professional. This article does not include advice pertaining to local building codes and/or any related inspections

It’s never too early to start thinking about winterizing your home. Ensuring your home is properly sealed not only keeps winter weather outside where it belongs, but it contributes to long-term home energy savings on your heating and cooling costs. Here are some ways to make sure your home is prepared for winter.

CHOOSE THE RIGHT SEALANT

The GE Sealants & Adhesives lineup offers a variety of caulks and sealants that can seal those gaps and cracks in your home that can lead to air infiltration, water damage and more.

Silicone sealants are a great choice because they’re 100% waterproof and extremely flexible, allowing them to withstand extreme weather. All Purpose Silicone 1® sealant creates a permanently waterproof, flexible and shrink and crack-proof seal. Plus, it can be same-day rain-ready1. If you’re looking for something with low odor and a shorter time for water exposure, Advanced Silicone 2® Window & Door sealant can be water-ready in as little as 30 minutes and offers 10-year mold-free protection2.

Should you need a paintable finish, Paintable Silicone Supreme Window & Door Sealant creates a strong, waterproof seal that can be paint-ready in as little as 30 minutes3.

APPLY THE SEALANT TO VULNERABLE AREAS

Now that you have chosen the sealant that fits your needs, it’s time for application. Start by inspecting the outside of the home: windows, doors, flashing and exterior trim. If these areas aren’t properly sealed, cold air and moisture can get in.

Before applying any new sealant, be sure to clean and remove any old sealant and make sure the surface is clean of paint, dirt, rust, mold and moisture.

Next, insert sealant into caulk gun and apply a steady bead that runs the length of the crevice and repeat. Finally, don’t forget to inspect your basement or attic for cracks and gaps as well. While you may not go into either very often, they’re prone to similar exposure.

OTHER WAYS TO WINTERIZE YOUR HOME

Sealing your home is a priority for tackling the winter weather, but there are other steps you can take along the way. For example:

  • Ensure your home is properly insulated
  • Use a smart thermostat to keep temperatures regulated
  • Put a cover over your water heater to retain heat
  • Ask your energy provider to conduct an energy audit.

These are simple ways to help winterize your home that can add up into savings.

Staying warm in the winter doesn’t have to be costly. Start by using the right sealants around your home and then follow through on other important ways that you can keep the heat in and the cold out.

Looking for more DIY project ideas? Visit our Projects & How To’s page for more.

Contact Form

How to Seal Your Crown Molding Like A Pro

  1. USE THE RIGHT SEALANT BEFORE YOU PAINT MOLDING AND TRIM FOR BEAUTIFUL RESULTS.
    For these kinds of projects, Max Shield Painter’s Siliconized Acrylic Latex Sealant is an excellent choice, ideal for tough paint projects both indoors and outdoors. This best-in-class paintable sealant offers durable, long-lasting results, backed by Tri-Shield Protection: extreme flexibility, 100% waterproof and mold resistance1.And, for paint projects that might be exposed to moisture, Paintable Silicone All Projects Kitchen & Bath Sealant is 100% weatherproof and has 10-year mold-free product protection1. And, its shrink and crack-proof formula can be paint-ready in just 30 minutes2.
  2. OPEN THE TUBE AND SEAL.
    Cut nozzle of your cartridge to the desired bead size. Pierce inner seal with seal punch found on most caulk guns. Insert cartridge into caulk gun. Squeeze with even, consistent pressure in order to control the rate the sealant that is dispensed from the cartridge. TIP: Apply masking tape to either side of a joint to create a straight edge before applying caulk to your molding, trim or baseboards.
  3. FILL EDGES AND GAPS.
    Apply sealant along the edges and joints of your molding, trim or baseboards. TIP: Seal molding and trim from top to bottom. Start by laying a bead on the top edge of your molding, then work your way down to avoid smudging your fresh caulk/sealant.
  4. SMOOTH THE SEAL.
    Use a gloved finger or caulk-smoothing tool to smooth caulk into joint within two to five minutes.
    TIP:
    If you applied masking tape in the previous step, remove immediately after smoothing the seal.
  5. CLEAN UP.
    Before the sealant cures, wipe away excess from surface and tools with a dry cloth. Let dry completely, typically within 24 hours, unless your sealant is 30-minute paint-ready (like Paintable Silicone Supreme Window & Door).If you’re tackling a sealing project, let GE Sealants & Adhesives help you get the job done right. Learn more from our other projects and how to’s for more tips and information.

Contact Form

Sealing to Prevent Pests

Caulk can serve as the first line of defense against pests by sealing gaps and cracks around a home, helping to prevent them from entering. It can be used alone as a proactive and insecticide-free approach or in conjunction with such products if pests have already penetrated the home.

  1. LOCATE THE POTENTIAL ENTRY POINTS FOR BUGS AND PESTS
    There are several areas on the interior and exterior of a home that could have gaps and cracks that should be sealed, including:EXTERIOR

    • Roof trim, roof rafters, joints, sheathing and siding
    • Exterior columns, steps, decks and porches
    • Exterior pipes and foundation
    • Doors, windows, door and window frames

    INTERIOR

    • Moldings and baseboards
    • Floorings and walls
    • Interior pipes and plumbing
  2.  FILL THE GAPS with a silicone sealant. A silicone sealant is best used:
    • To fill gaps or cracks smaller than 1/2″ by 1/2″ (unless using backer rod)
    • For inside or outside applications
    • For applications that require flexibility due to joint movement
    • RECOMMENDED PRODUCT: Advanced Silicone 2+ Window & Door Sealant
  3. PREP FOR SEALING:
    • CLEAN THE SURFACE
      Remove old sealant, dirt and loose particles with a caulk-removing tool, or a wire brush for concrete and masonry applications, and wipe clean with a cloth. Apply masking tape to either side of the joint to create a straight edge. (Remove immediately after caulk application.)
    • READ ALL SAFETY INSTRUCTIONS BEFORE USE AND FOLLOW COMPLETELY
      Wear safety goggles, gloves, respiratory protection and protective clothing.
  4. PREPARE THE TUBE AND SEAL
    Cut the nozzle to desired bead size. Pierce the inner seal with a stiff wire or other similar object. Insert the cartridge into the caulking gun. Seal around unsightly cracks or spaces inside and outside the home. If using a caulk gun, squeeze with even, consistent pressure to control the rate at which the caulk leaves the tube.
  5. SMOOTH THE SEAL
    Use your gloved finger or a wet caulk-smoothing tool within two to five minutes of application.
  6. STORE THE TUBE AND CLEAN
    Adjust pressure to the gun so that the sealant is barely coming out of the tube. Replace the cap, or use a nail or similar object to seal the tube opening. To clean the area around the sealed joint, use mineral spirits for silicone sealants; wipe excess material from tools and clean accordingly as well.

*Silicone 2 is a trademark of Momentive Performance Materials Inc.

Contact Form

Sealing a Bathroom in 5 Easy Steps

  1. CHOOSE THE RIGHT BATHROOM CAULK OR SEALANT SO YOU DON’T HAVE TO DO THIS AGAIN AND AGAIN.
    To stand up to the daily demands of a bathroom, select a 100% silicone or paintable silicone sealant. GE-branded 100% silicone and paintable silicone sealants never shrink or crack, creating a long-lasting, flexible, waterproof seal around showers, bathtubs, countertops and sinks. If the surface will be painted, make sure to choose a paintable silicone, if not a 100% silicone will give you the protection you need.
  2. CLEAN THE SURFACE.
    Remove old caulk/sealant from your shower, bathtub, sink or countertop. Typically, it needs to be cut, scraped or chipped away from these areas using a utility knife, putty knife or painter’s multi-tool. To assure proper adhesion, remove soap scum and other residue from the surface to be sealed prior to application. Thoroughly rinse the area with soap/cleanser and wipe away excess water. TIP: Wiping the joint with alcohol or window cleaner ensures no soapy residue is left behind.
  3. OPEN THE TUBE AND SEAL.
    Cut nozzle of your bathroom cartridge to the desired bead size. Pierce inner seal with seal punch found on most caulk guns. Insert cartridge into caulk gun. Squeeze with even, consistent pressure to control the rate the caulk/sealant leaves the tube.
    TIP: Apply masking tape or painter’s tape to either side of a joint to create a straight edge before applying caulk to your bathtub, shower or countertops.
  4. SMOOTH THE SEAL.
    Use a gloved finger or caulk-smoothing tool to smooth caulk/sealant into joint within two to five minutes.
    TIP: If you applied masking tape in the previous step, remove immediately after smoothing the seal.
  5. CLEAN UP.
    Before caulk cures, wipe away excess sealant on surface, hands and tools with a dry cloth.

WHERE TO BUY

Find GE-branded caulks and sealants near you.

HOW MUCH DO I NEED?

One 10.1 oz. cartridge is enough to caulk two bathtubs and one sink.

1 Fully cured sealant is resistant to stain-causing mold and mildew. Regular cleaning of sealant is required however, as soap and other residue may cause secondary mold and mildew growth

2Exposure to water possible in as little as 30 minutes with bead size max 3/16″”, temperature min 65°F and humidity min 50%. Otherwise, sealant should not be exposed to water for 8 hours. Do not touch or clean sealant for 24 hours. While this is neutral curing methoxy silicone will not blemish most metal finishes, testing of product on a small indiscreet area before use is recommended.

3Sealant can be painted in as little as 30 minutes with bead size 3/16″”, temperature min 65°F & humidity min 50%. Otherwise, seals should not be painted for 2 hours. Spray paint can be applied immediately. Apply paint with reduced applicator pressure to avoid disturbing the caulk. Not recommended with oil-based paints. If oil-based paints are used, first test by applying an acrylic primer and paint in a small, inconspicuous area.

Contact Form

How To Install a Drop Sink

Transform the look of the entire bath or kitchen by replacing the focal point of the room the sink drop in sink installation is a basic project for a beginning diyer.

Note: This DIY article is provided as a general guide only, and is not intended to take the place of product-specific installation procedures; always follow applicable manufacturers’ instructions. Depending on your home’s age and condition, location within the home, and other potential factors, repairs and/or upgrades or other services may be necessary prior to the beginning and/or completion of your project that may involve the services of a home improvement professional. This article does not include advice pertaining to local building codes and/or any related inspections.

Project time: approximately 3 hours

  1. GATHER YOUR MATERIALS
    Required materials may include: safety goggles, bucket, measuring tape, carpenter’s pencil, utility knife, adjustable pliers, pipe wrench, adjustable wrench, crowbar, jigsaw, screwdriver, tube cutter, copper tubing, emery cloth, propane torch, solder, flux, tape, screws or nails, taping knife, paint and paintbrush; tiles, adhesive, and grout as needed to finish the countertop; spirit level, plumber’s putty, power drill and carbide bit; GE Silicone 2+ Kitchen & Bath sealant, and a caulking gun.
  2. DETERMINE LOCATION FOR SINK AND MEASURE PLACEMENT
    After you’ve determined the best location for the sink, turn the sink upside down and position it on the countertop in the spot you eventually want to place it. Measure the width and depth of the sink. Check under the cabinet to make sure the new sink will have enough clearance for the faucet supply plumbing and the drain assembly. Also, you will need to be sure it will clear the structural parts of the cabinet.
  3. TRACE THE SINK ONTO THE COUNTERTOP
    With the sink upside down and in its final position, lightly trace the perimeter of the sink onto the countertop with a pencil. Measure the length of the sink’s lip (the part that will lay flush on the countertop). Most sinks have a 1/2″ lip. Remove the sink. Draw a cut line 1/2″ (approximately the size of the sink lip) inside the previously traced perimeter line.
  4. MEASURE THEN DRILL A PILOT HOLE
    Before you drill or cut, measure everything again to make sure your sink will fit properly When you’re sure of the placement, at any point, drill a hole to the inside tangency of the cutline big enough to accept the blade from your jigsaw. With a jigsaw, cut the opening along the cut line (1/2″ inside the sink’s perimeter line).
  5. MOUNT ALL OF THE SINK HARDWARE
    Following the manufacturers’ instructions, mount the faucet and drain assemblies to the drop-in sink. Be certain to apply a bead of plumber’s putty to the underside of the drain in order to provide a watertight seal. Wipe away any excess sealant before it begins to cure.
  6. CHECK THE SINK FITS
    Before applying any sealant, place the sink with the drain and faucet assemblies into the opening to ensure it fit. Position the sink in its absolute final location and mark several guide points around the sink and countertop with a light pencil.
  7. APPLY THE SEALANT
    Remove the sink and place it upside down. Apply an unbroken 3/8″ bead of GE Silicone 2+ Kitchen & Bath sealant to the underside of the sink’s lip.
  8. LOWER SINK INTO THE OPENING
    Carefully lower the sink back into the opening and align it with the pencil guides. Press the sink down firmly to spread the sealant and form a watertight seal between the sink and the countertop. Wipe away any excess sealant with a clean, dry cloth before it begins to skin—within two to five minutes. Allow the sealant to cure completely before connecting the plumbing supplies and drain. GE Silicone 2+ Kitchen & Bath sealant will typically cure in 24 hours.
  9. ATTACH PLUMBING TO SINK
    Once the sealant has completely cured, follow the manufacturer’s instructions for completing the attachment of all of the plumbing components.

Contact Form

How to Caulk in 5 Easy Steps

  1. CHOOSE THE RIGHT SEALANT
    A sealant that keeps air and water out over time is a necessity when sealing around the home. For a long-lasting seal, choose a permanently waterproof, flexible, shrink-/crack-proof 100% silicone sealant. Air and water can seep through gaps left by cracked caulk. Those leaks can lead to water damage, mold growth, and higher energy bills. Look for GE Silicone 2*+ Window & Door Sealant or Kitchen & Bath Sealant, or, if you are painting, try Paintable Silicone All Projects Kitchen & Bath Sealant or Paintable Silicone All Projects Window & Door Sealant
  2. CLEAN THE SURFACE
    Remove old caulk/sealant, dirt, and loose particles with a caulk-removing tool, or a wire brush for concrete and masonry applications, and wipe clean with a cloth. Apply masking tape to either side of the joint to create a straight edge. (Remove immediately after caulk application.)
  3. PREPARE THE TUBE AND SEAL
    Cut the nozzle to the desired bead size. Pierce the inner seal with a stiff wire or similar object. Insert cartridge into caulking gun. Seal around unsightly cracks or spaces inside and outside the home. If using a caulk gun, squeeze with even, consistent pressure to control the rate at which the caulk leaves the tube.
  4. SMOOTH THE CAULK SEAL
    Use your gloved finger or a wet caulk-smoothing tool within two to five minutes of application to help achieve a smooth, clean bead of caulk.
  5. STORE THE TUBE AND CLEAN
    Adjust pressure to the gun so that the caulk/sealant is barely coming out of the tube. Replace the cap, or use a nail or similar object to seal the tube opening. To clean the area around the sealed joint, use mineral spirits for silicone sealant, and soap and water when using an acrylic; wipe excess material from tools and clean accordingly as well.

SHOPPING LIST

  • GE-branded 100% silicone or paintable silicone sealant
  • Dripless caulk gun
  • Caulk-removal tool, putty knife, painters multi-tool or utility knife
  • Clean cloths
  • Gloves
  • Caulk-smoothing tool


SEALING TIPS AND ADVICE


SEALING WINDOWS, DOORS, ATTICS, AND BASEMENTS

  • Make sure doors and windows are closed securely and do not need to be rehung.
  • If you plan to paint the window or doorframe, make sure the caulk or sealant you use can also be painted, or that the color caulk will be compatible with surrounding materials.
  • Pre- test the product flow to get comfortable with using the gun and with your technique for applying the appropriate trigger pressure before you start your job.

SEALING KITCHEN, BATH, AND PLUMBING APPLICATIONS

  • Swab the joint to be sealed with rubbing alcohol to remove soap scum, body oils, and other residue. Rubbing alcohol dries quickly and is an excellent way to prepare the surface for proper adhesion.
  • When caulking around a bathtub, it is recommended that you first fill the tub with water to pull it the furthest distance from the opposing joint edge. Apply a fresh bead of sealant to the joint.
  • If you are caulking a shower stall, work from the inside out. Seal the inside seams before the external ones so as to avoid disturbing the uncured caulk.

TESTING FOR ENERGY LEAKS

Your home should be tested twice a year (once in the spring and again in the winter) to see if you are protected from energy loss, pollution, pests, and moisture. If you find gaps and cracks, be sure to seal them—it’s as easy as five simple steps.

  • Test #1: The dollar bill test: Place a dollar bill between the doorjamb or between the window sash and sill. With the door or window closed, attempt to remove the dollar bill. If it slides out easily, the area is subject to energy loss.
  • Test #2: The flashlight test: Shine a flashlight around the edges of your door at night. If you can see light from the other side, the area subject to energy loss.
  • Test #3: The moist hand test: Pass a moist hand around the edge of your doors and windows. Where you feel a draft, the area is subject to energy loss. This test works best on cold, windy days.