Product Finder
Indoors
Outdoors

Contact Form

Let’s learn how to seal windows and doors. How to seal windows and doors

Note: This DIY article is provided as a general guide only and is not intended to take the place of product-specific installation procedures; always follow applicable manufacturers’ instructions. Depending on your home’s age and condition, location within the home, and other potential factors, repairs and/or upgrades or other services may be necessary prior to the beginning and/or completion of your project that may involve the services of a home improvement professional. This article does not include advice pertaining to local building codes and/or any related inspections.

Sealing windows and doors effectively is an essential DIY skill for homeowners. Properly sealed windows and doors prevent drafts, reduce energy costs, and help you maintain a comfortable indoor environment. On the other hand, poor sealing causes air leakage, water infiltration, and — in extreme cases — long-term structural damage to your home.

9 steps for sealing windows and doors in your home

In this guide, we’ll walk you through the process of sealing windows and doors to ensure they are fully protected against air and moisture. Whether you’re preparing your home for winter or simply looking to improve your home’s energy performance, following these steps will help you achieve professional results.

  1. Inspect the area

    Before applying any sealant or foam, thoroughly inspect the windows and doors you plan to seal. Look for existing gaps, cracks, or damage around the frames, as these areas may need repair before sealing. Make sure the surfaces are clean, dry, and free of dust or old caulking. Caulk residue and dust can prevent new materials from adhering properly. Pay close attention to corners and joints, where air and water leakage are more common. By starting with a clean and prepared surface, you’ll achieve a longer-lasting, more effective seal.

  2. Choose the right materials

    When sealing windows and doors, the quality of the outcome largely depends on the quality of the materials you choose. You can use either silicone or polyurethane sealant. However, silicone sealant is generally preferable to polyurethane for this task due to its superior flexibility and weather resistance.

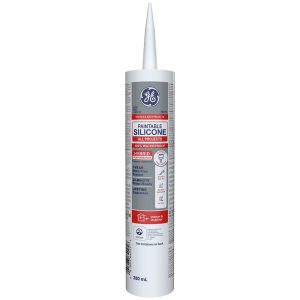
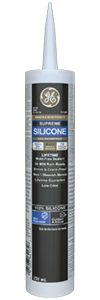
    A photo of Supreme Silicone Window & Door Sealant

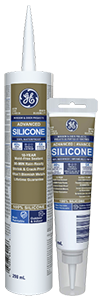
    Silicone sealants like Supreme Silicone Window & Door Sealant hold an effective seal in extreme temperatures. For the same degree of protection but in a variety of color options, choose Advanced Silicone 2® Window & Door Sealant. Silicone also resists UV degradation, which is important for exterior applications. Polyurethane, while strong, can break down more quickly when exposed to sunlight and fluctuating temperatures.

  3. Apply painter’s tape

    Place painter’s tape at the edges around the window or door frames to protect adjacent surfaces and help you maintain straight lines. Then measure the gaps around the windows and doors to determine how much sealant or foam you’ll need. Taking the time to prep the area properly helps prevent over-application and ensures an even, effective seal around the frame.

  4. Apply insulating foam around windows and doors

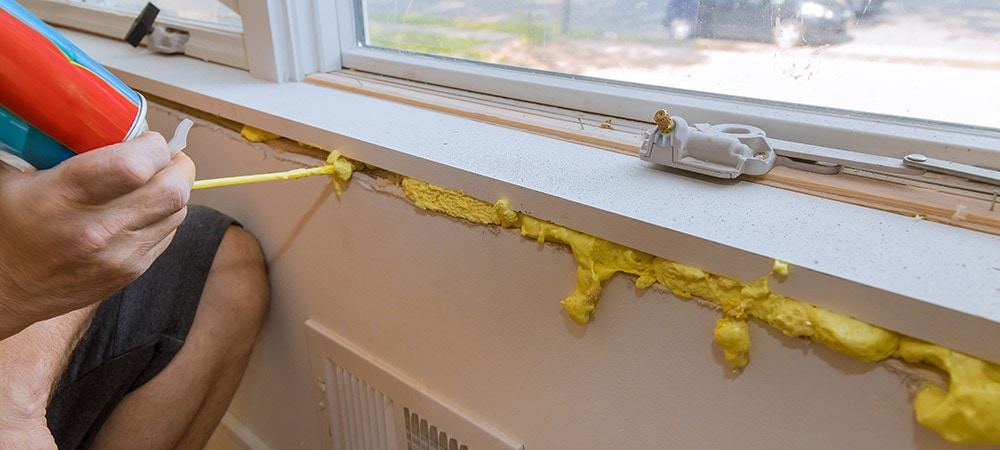
    Expanding foam insulation is ideal for filling large gaps around windows and doors, as it provides both insulation and an airtight seal. Choose a foam specifically designed for windows and doors. Standard foams expand more and may warp your window and door frames. Hold the can upright and apply the foam in layers, filling gaps to about 50% to allow room for expansion. Be patient and resist the urge to fill the gap entirely, as an excess of even the right foam can create pressure that deforms window and door frames.

    Apply the foam at a depth that fills the gap upon expansion but doesn’t spill out from the frame. If foam overflows, wait for it to dry and then trim the excess with a utility knife. Always wear gloves and protective eyewear while applying foam to avoid irritation.

  5. Apply sealant

    After applying insulating foam, it’s time to seal the edges with sealant or foam. While foam fills larger gaps and provides insulation, silicone sealant creates a waterproof barrier around window and door frames.

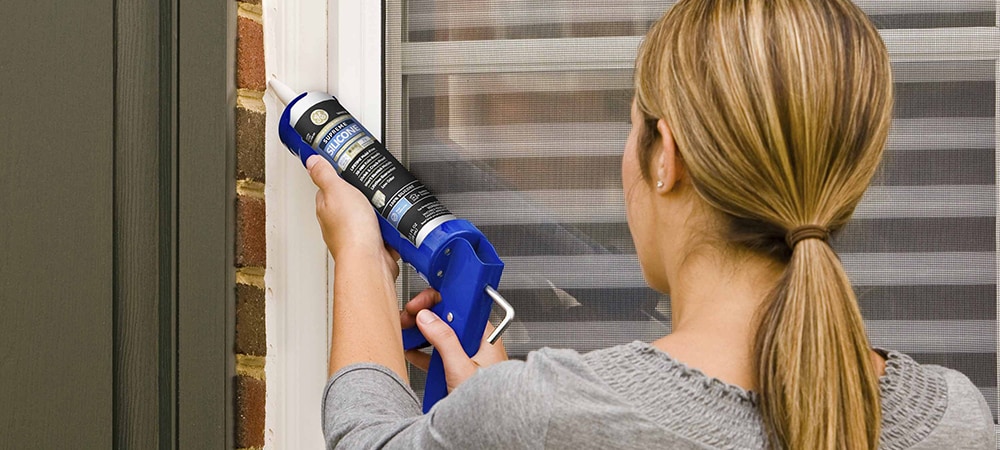
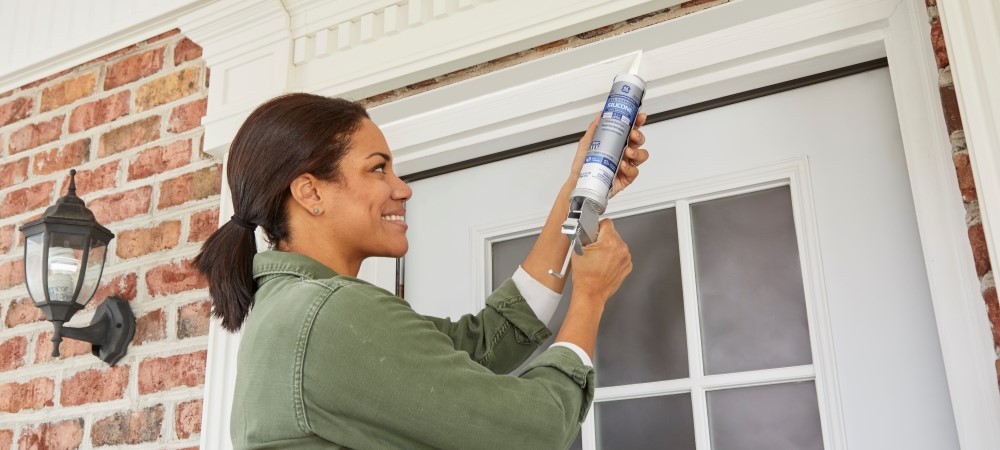
    Start by cutting the tip of the sealant tube at a 45-degree angle for better control. Apply a continuous bead of sealant around the perimeter where the frame meets the wall or siding. Use steady, even pressure on the caulking gun, and smooth the bead with a gloved finger or caulk-smoothing tool for a clean finish. Make sure not to seal over areas that allow for movement or drainage.

    Don’t block window weep holes during the sealing process. Weep holes prevent water buildup that causes rot or mould. Leave weep holes clear to maintain proper drainage and protect the window from water damage.

  6. Seal

    Weep holes are small openings at the bottom of window frames designed to allow water to escape. It’s important not to block these during the sealing process, as they play an essential role in preventing water buildup that causes rot or mould. While sealing the rest of the window frame is important, leaving weep holes clear helps maintain proper drainage and protects the window from water damage.

    When applying sealant or foam around windows, avoid covering the weep holes. If you accidentally seal the holes, use a small tool like a screwdriver to clear the blockage after the sealant has set. For extra caution, consider using tape to mark off the weep holes before you begin sealing. Keeping these drainage pathways open allows rainwater or condensation to escape.

  7. Test the sealed areas for leaks and drainage

    Once you’ve sealed the windows and doors, check that the weep holes are functioning correctly. Pour a small amount of water along the bottom edge of the window frame and watch to see if it drains through the weep holes. If water pools or doesn’t drain, check to see if sealant or debris is blocking the openings. This simple test will save you headaches and repair costs later on.

  8. Allow the sealant to cure

    After applying sealant, allow adequate curing time before exposing it to moisture or extreme temperatures. Depending on the type of sealant used, curing may take anywhere from 24 to 48 hours. In any case, follow the manufacturer’s guidelines to ensure the sealant is set properly.

  9. Check sealant for gaps

    After the sealant cures, inspect all sealed areas for gaps or weak spots. Pay special attention to areas prone to moisture. Re-inspect after a rainstorm or seasonal change to check that the seals remain intact. Regular inspections help maintain long-term effectiveness and protect against potential water damage.

To get GE Sealants’ products for your home improvement project, visit these fine retailers.
Contact Form

Let’s learn how to caulk like a pro. Caulking 101: How to caulk like a pro

Note: This DIY article is provided as a general guide only and is not intended to take the place of product-specific installation procedures; always follow applicable manufacturers’ instructions. Depending on your home’s age and condition, location within the home, and other potential factors, repairs and/or upgrades or other services may be necessary prior to the beginning and/or completion of your project that may involve the services of a home improvement professional. This article does not include advice pertaining to local building codes and/or any related inspections.

If you own and maintain a home, chances are you’ll need to learn how to caulk — along with when and where — at some point. Proper caulking can prevent leaks, improve energy efficiency, and give fixtures and surfaces in your home a neat, professional appearance. By sealing gaps and cracks, caulk helps to maintain a comfortable indoor environment and protect your property from water damage and drafts.

Materials and tools needed to caulk like a pro

This is a comprehensive guide to caulking that includes a list of tools and materials, preparation steps, and caulking tips and tricks for achieving a professional finish. Whether you’re sealing windows, doors, or baseboards, understanding how to apply caulk correctly will help you get the job right the first time. Additionally, this guide explains the differences between acrylic caulk and silicone sealant to help you choose the right product for various tasks around your home. With the right knowledge and skills, you can tackle caulking projects with confidence and achieve professional-grade results.

Before you begin any sealing project, gather the right materials and tools. The key items you’ll need are:

  • Caulk: Choose the appropriate type for your project. Silicone sealant is ideal for non-porous surfaces like glass and metal, while acrylic caulk works well on wood and drywall.
  • Caulk gun: A quality caulk gun helps deliver a consistent and controlled application. Look for one with smooth trigger action.
  • Painter’s tape: Use painter’s tape to create clean, straight lines and prevent caulk from spreading onto unwanted areas.
  • Utility knife: A sharp utility knife is necessary for cutting the caulk tube nozzle and removing old caulk.
  • Caulking tool or spoon: These tools help to smooth applied caulk for a professional finish.
  • Cleaning supplies: Have rags, a vacuum, or a brush on hand to clean the surface before applying new caulk.

Where to use acrylic caulk vs. where to use silicone sealant

Acrylic caulk is ideal for areas that require a rigid, paintable seal — areas like windows, doors, and baseboards. It effectively fills gaps and cracks and prevents drafts and moisture from entering your home. On the other hand, silicone sealant is more suitable for areas exposed to significant moisture and movement, such as bathrooms, kitchens, and exterior surfaces.

Acrylic caulk and silicone sealant serve similar purposes and may seem more or less interchangeable to first-time users. However, there are some important differences you need to know. Caulk is ideal for areas that require a rigid, paintable seal — areas like windows, doors, and baseboards. It effectively fills gaps and cracks and prevents drafts and moisture from entering your home.

On the other hand, sealant is more suitable for areas exposed to significant moisture and movement, such as bathrooms, kitchens, and exterior surfaces. Silicone sealant provides a flexible, waterproof seal that expands and contracts with the movement of sealed joints in these areas.

Knowing the difference between caulk and sealant will help you choose the right product for each task. By applying both caulk and sealant in their respective appropriate places, you can maintain your home for years to come.

How to seal: Preparation

Successful sealing starts with proper preparation. Start by thoroughly cleaning the surfaces where you will apply caulk. Use a vacuum or brush to remove any dust or dirt. For stubborn grime, a mild detergent solution can help. Once clean, make sure the area is completely dry, otherwise caulk may not adhere properly.

Next, remove any old caulk from the seams. A utility knife or a specialized caulk removal tool works great for this task. Carefully cut along the edges of the old caulk and peel it away by hand, taking care not to damage the surrounding surfaces.

Once the old caulk is removed, wipe down the area with a damp cloth to remove any remaining residue. Allow it to dry completely. Finally, apply your painter’s tape along the edges of the seam to create clean lines.

Loading and using the caulking gun

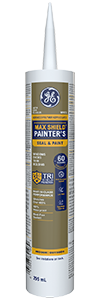
First, cut the nozzle of the caulk tube — we recommend Max® Shield Painter’s Pro for areas you intend to paint — at a 45-degree angle and try to match the opening to the size of the gap you need to fill.  Smaller openings usually allow for more precise control.

Pierce the inner seal foil first. Then insert the caulk tube into the caulking gun, making sure it is securely in place. Press the release trigger to engage the plunger and the tube. Before you start on your intended surfaces, practice squeezing the trigger a few times to get a feel for the pressure needed to maintain a steady flow.

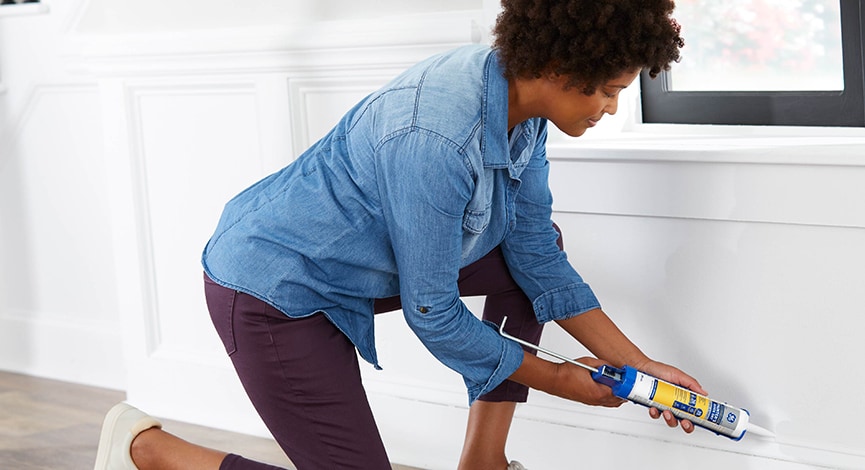
When you’re ready to apply caulk, hold the gun at a consistent 45-degree angle to the seam. Apply steady pressure on the trigger and run the gun smoothly along the joint. As much as possible, maintain consistent speed and pressure for more consistent results. After applying the caulk, use a caulking tool or your finger to smooth the bead.

Caulking tips and tricks

To achieve a professional finish when caulking, learn these best practices and common mistakes:

Best practices:

  • Cut the nozzle correctly: Cut the nozzle at a 45-degree angle to control the flow and match the gap size.
  • Test before applying: Practice on a piece of cardboard to get a feel for the caulking gun’s pressure and flow.
  • Work in small sections: Apply caulk in manageable sections to maintain control and precision.
  • Smooth immediately: Smooth the caulk immediately after application using a caulking tool or a wet glove finger.

Common mistakes to avoid:

  • Skipping surface preparation: Always clean and dry the surface thoroughly before applying caulk.
  • Applying too much caulk: Avoid overfilling gaps, as excess caulk can be difficult to smooth.
  • Not smoothing caulk: Failing to smooth the bead leaves uneven and weak seals.
  • Ignoring curing time: Allow the caulk to cure fully as per the manufacturer’s instructions before exposing it to moisture or paint.

To get GE products for your home improvement project, visit these fine retailers.
Contact Form

Keep your house secure 5 use cases for all-purpose silicone sealant around your home

Note: This article is provided as a general guide only and is not intended to replace product-specific installation procedures; always follow applicable manufacturer’s instructions. Depending on your home’s age and condition, location within the home, and other potential factors, repairs, upgrades, or other services may be necessary before the beginning or completion of your project that may involve the services of a home improvement professional. This article does not include advice about local building codes or related inspections.

Any time you walk through the home repair section of your favourite store, you will see silicone sealant sitting on the shelf. What uses does it have to earn this spot of honour? Let’s dive into what all-purpose silicone sealant is and how it compares to your other options so you can decide if it’s the best tool for your job. In addition, get ready to explore five ways you can use all-purpose silicone around your home.

What makes all-purpose silicone sealant unique?

Most sealants qualify as either caulk or silicone sealants. Caulk has an acrylic base, which gives it a firm seal. It works well for high-traffic areas. However, because caulk dries so rigid, it is more prone to cracking over time.

Silicone sealant is a slightly softer sealant. The softness is the sealant’s strength as it gives it greater flexibility. As surfaces move or change with the weather, the silicone sealant moves with the surfaces, ensuring a secure seal.

Silicone sealant is also the best option for high-moisture areas. That’s why it’s very popular when sealing windows and doors where they will be in contact with rain and other elements. It also works well in kitchens and bathrooms and handles a significant amount of water.

Silicone sealant is a flexible sealant that can withstand extreme temperatures and environments without cracking.

How is all-purpose silicone sealant different from other silicone sealants?

When you search for silicone sealant, you will see dozens of options. It can feel overwhelming, and sometimes, you might think the best option is to use an all-purpose sealant. An all-purpose sealant, after all, is supposed to work for any job.

What makes all-purpose sealant unique is that it’s flexible and versatile. It’s strong enough to stay in place for years but gentle enough not to mess up various finishes.

If you’re in doubt, opting for an all-purpose sealant is always a reliable fallback. However, before you do, ask yourself these questions:

  • Are you applying the sealant outside? While all-purpose sealant can work outside, you may want to consider an outdoor sealant like Supreme Silicone Window & Door Sealant. The outdoor sealant has extra protection against the elements and the sun’s UV rays.
  • Are you applying the sealant in a high-moisture area? Silicone sealant is 100% waterproof. Purchasing a silicone sealant for kitchens and bathrooms can give you the extra strength needed to fight the mould and stay strong, even with increased moisture exposure.
  • Are you sealing a special surface? All-purpose silicone, while very versatile, doesn’t adhere to all surfaces. Always test a small area before fully sealing it to ensure it is compatible with your project. If you are working with a specialty material, like metal, find a sealant formulated for that surface for the best adhesion.

Before using an all-purpose sealant, check your store for sealants explicitly designed for your job. While bathroom and door sealants are standard options, you may be surprised at some less common options that are still available. For example, marine sealants are formulated for sealing boats.

For general household tasks, an all-purpose silicone sealant is the tool that will get the job done right.

5 ways to use all-purpose silicone sealant around your house

Silicone sealant has a wide variety of uses, making it a staple in any home.

  1. Sealing gaps in your home

    Cracks and gaps can hurt your home’s energy effectiveness as cool air seeps in and warm air sneaks out. In addition to weather, gaps can also allow pests to enter your home.

    A solid all-purpose sealant helps plug in those holes. The flexibility allows the wall around to shift and move with the extreme Canadian temperatures without causing the sealant to crack.

  2. Preserving bathroom appliances

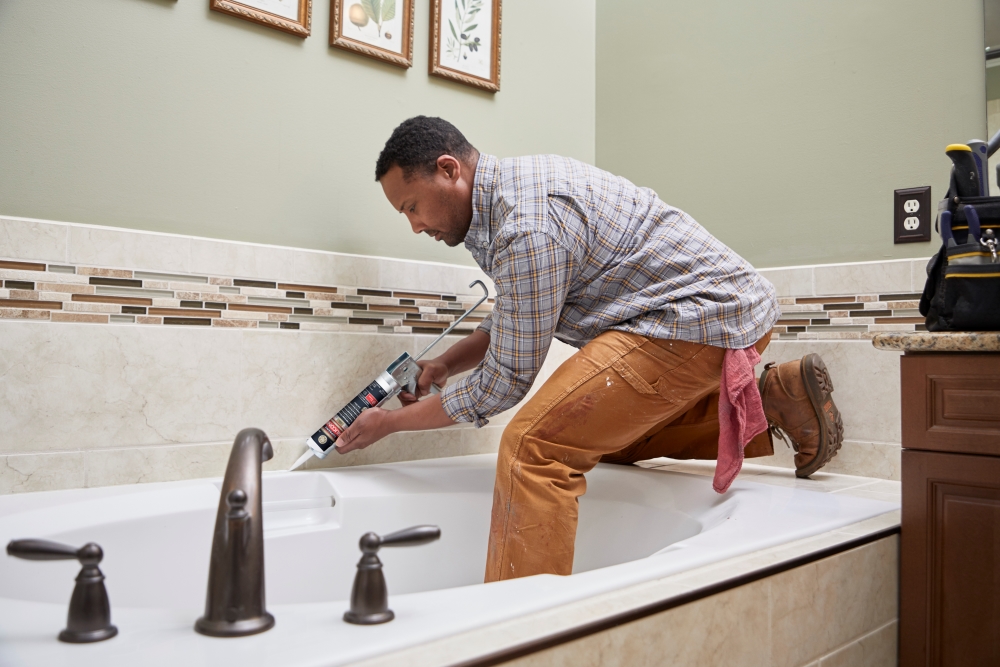
    Protect your bathroom appliances from moisture, bacteria, and mould by sealing all gaps with silicone sealant. The waterproof formula of the sealant will fight off the moisture without taking a hit in its      security. In addition, its flexibility allows room for movement, especially around the toilet and pipes. Seal around your tub, sinks, toilets, and anywhere pipes go into the wall for the most thorough seal.

    Sealing a bathroom
    Sealing a bathroom
  3. Protecting kitchen appliances

    The kitchen is another hot spot for moisture, which can lead to bacteria and mould. Silicone sealant’s mould-resistant formula helps prevent that growth. Its strong, flexible seal also holds up to the continued wear and tear of kitchen use thanks to its flexibility and waterproof formula.

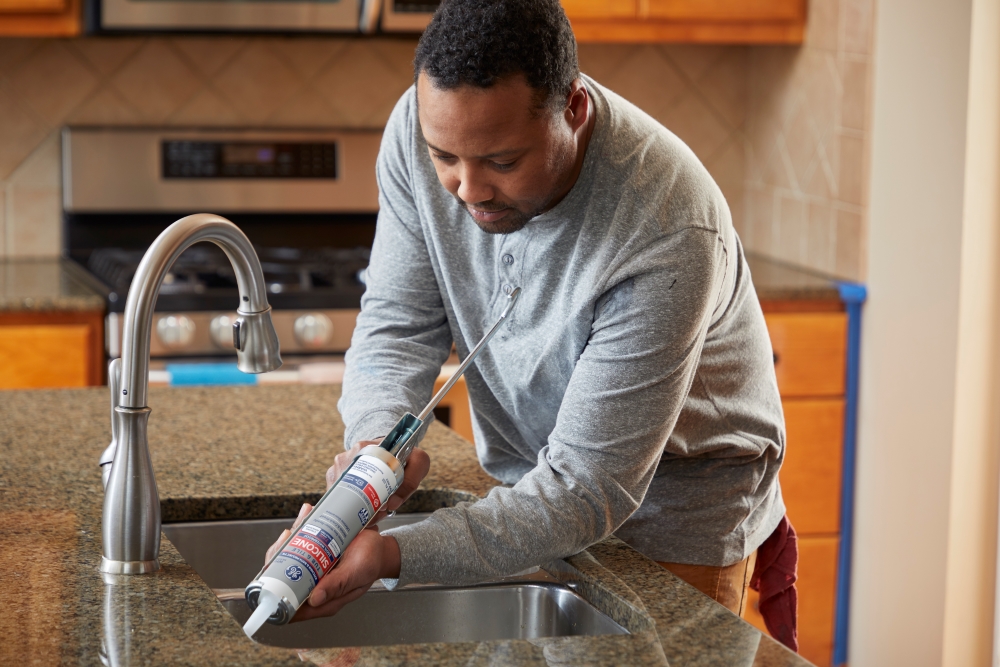
    Seal your kitchen counters where they meet the wall and backsplashes that prevent water from contacting the wall. Be sure to thoroughly seal around your sink as it’s the area of your kitchen most prone to mould growth.

    Sealing a kitchen
    Sealing a kitchen
  4. Strengthening outdoor spaces

    Silicone sealant is a reliable outdoor sealant as well as an indoor staple. Its flexibility and waterproof formula can help protect concrete cracks, chips in tiles, and holes in the wall. It will fill in those spaces, giving those items new life and strength. You can also use it to seal your exterior foundation, doors, and windows to keep out pests and weather.

  5. Completing DIY projects

    All-purpose sealants aren’t limited to home repairs. Sealants are very flexible, which also makes them ideal for crafting.

    Silicone might be your best option if you need a strong, flexible seal. You can use it for anything from weather-proofing outdoor décor you create to protecting bathroom furniture you DIY’d. All-purpose clear silicone can adhere to most surfaces without taking away from the look while coloured silicone can match the surface you are sealing.

    Here are a few of the top DIY projects that silicone can help create:

    • Art: Silicone can protect art and décor from the elements. You can also use the silicone to make crafts by drying its strong beads in decorative patterns.
    • Costumes: Silicone sealant can help designers create jewelry and costume pieces. Because of its flexibility and strength, you can dry it in any shape, and it will hold up.
    • Crafts: While silicone sealant isn’t a glue, some crafters use it as a waterproof glue substitute. Silicone can help connect pieces on a bathmat and other water-exposed areas.
    • Home items: Silicone sealant can help fix or create household items. It can repair furniture or help you design furniture with a strong bond.

Keep your home sealed tight with all-purpose silicone sealant. You’ll preserve your home and appliances longer while creating a visually appealing aesthetic.

Find an all-purpose silicone sealant in a store near you.

Contact Form

Keep the pests at bay and strengthen your doors Insider secrets to using silicone sealant to protect and seal your doors

Note: This article is provided as a general guide and is not intended to replace product-specific installation procedures; always follow applicable manufacturer’s instructions. Depending on your home’s age and condition, location within the home, and other potential factors, repairs and/or upgrades or other services may be necessary before the beginning and/or completion of your project that may involve the services of a home improvement professional. This article does not include advice about local building codes or related inspections.

A doorway welcomes friends and family to your home, but it shouldn’t welcome pests, moisture, and mould. It should be an entryway for those you care about and the first line of defense against unwelcome weather and bugs. By using door sealant, you can protect your home and its insides by sealing small gaps that can quickly become big problems.

We bring you our favourite products for sealing doors, plus tips the pros use to ensure an airtight seal.

Where to apply door sealant for maximum protection

Silicone sealant goes on door frames after installation. You can place it between the frame and the wall to give the frame an extra secure seal. You apply the sealant for doors to both the interior and exterior sides of the door      .

If in doubt, ask yourself whether there’s a gap or if there is potential for a gap. If there is, you most likely need sealant, such as around a      door frame.

The exception would be the door itself. Your door would not use silicone sealant since it needs an easy range of motion. That’s why you would use a weather strip. A weather strip forms a seal when the door is closed but can move with it when it’s open.

If your door has windows, you may want to use silicone sealant to fill in any gaps those windows might leave for air seeping in, mould growth, and pests.

How door sealant protects your frame and door

Do you need to use front door sealant on your house?

That decision is ultimately yours, but here are the benefits you’ll gain by using a door frame sealant.

  • Moisture resistance: One of the most significant benefits of sealing your door is preventing moisture buildup. No matter how small, the gap between your frame and wall can capture moisture, especially on the outside. Over time, that moisture will turn to mould, which can cause much more extensive damage.
  • UV protection: Sunlight tends to degrade materials over time. Sealants can prevent some sun damage, especially around the edges and cracks where the frame is already weak.
  • Temperature protection: Materials can also grow or shrink as temperatures change. This is often a cause of cracking. A flexible silicone sealant moves with the door frame, holding it secure and supporting it through temperature fluctuations, minimizing the cracks that otherwise result.
  • Aesthetic preservation: Sealed doors look more aesthetic than unsealed doors. You can fill in unsightly gaps and smooth the transition from frame to door. This seal keeps the door looking well-maintained and aesthetic for longer.
  • Pest protection: While that small gap may seem insignificant, that’s all it takes for pests to enter your home.  Bugs, such as ants, or mice will find any gaps, especially around doors, to invade your home. You can keep out more of those pests from your home by sealing those gaps.

Sealing your door’s interior and exterior frame prevents moisture damage, protects against UV damage, supports the frame during temperature changes, keeps out pests, and improves your door’s aesthetic.

5 steps to apply door sealant that will last

Follow these five steps to apply door sealant like a pro.

  1. Choose the right sealant

    Not all sealants are the same. Pros carefully choose the best sealant for their surface and desired results.

    In this case, because the sealant goes outside in addition to inside, you will want a weather-resistant sealant for door frames. You will also want a sealant compatible with materials commonly found on door frames, especially if you have windows in the door you also plan to seal.

    GE sealant’s Supreme Silicone Window & Door sealant checks all the boxes. It’s durable, weatherproof, and has a lifetime of mould-free protection. Due to its extra flexibility, it lasts longer and can change with extreme Canadian temperatures.

    Because it is a silicone sealant, you can’t paint over it. However, it comes in six colours, matching your door and frame for a quality finish. It can even adhere to high-end metal finishes like chrome, bronze, and nickel.

  2. Prepare the surface

    Before jumping right into applying the door silicone sealant, take time to clean the surface area. You want to remove dirt and grime that might compromise the sealant’s adhesion. You will also remove old paints, varnishes, and silicone.

    If you have a wooden door frame, we recommend sanding it down if it has any coatings that might prevent the sealant from fully adhering to the door frame.

    You will then wait till the surface is completely dry after cleaning before beginning your sealant process.

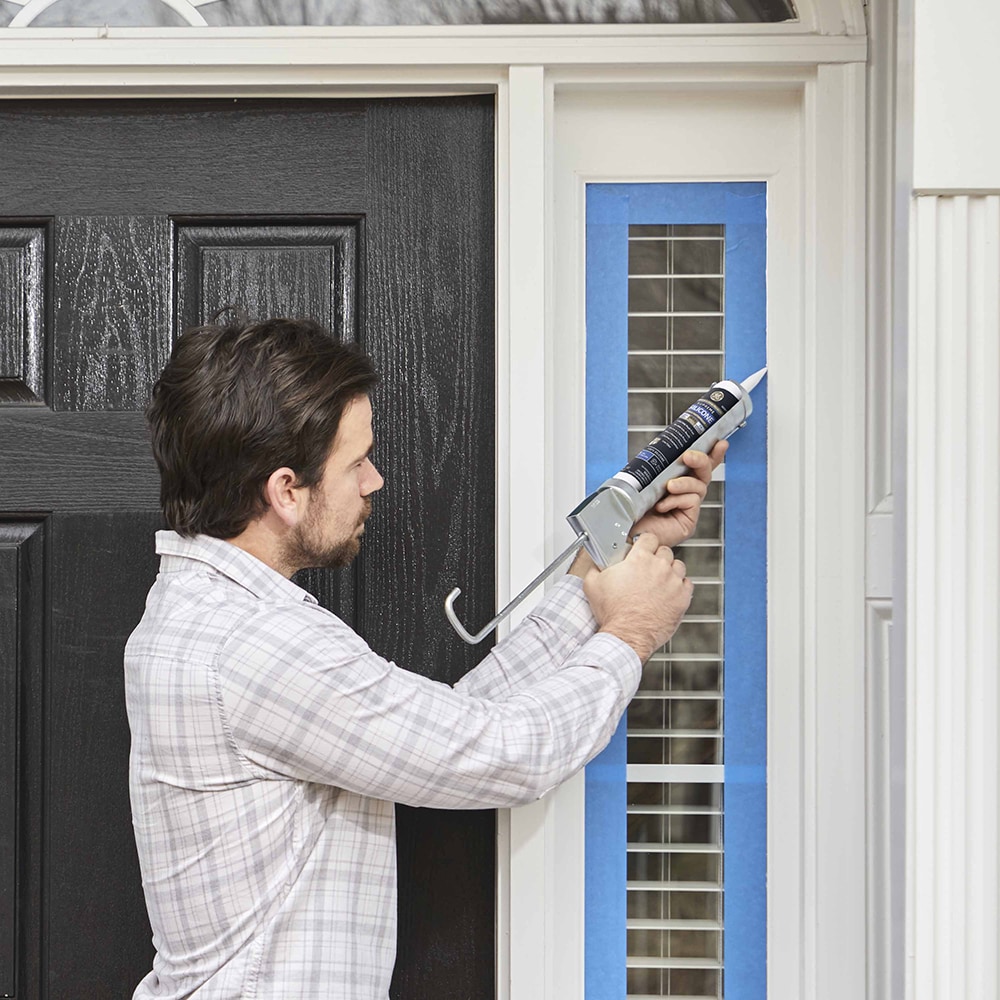
    You may want to apply painter’s tape on areas you don’t want to accidentally drip sealant on, such as hardware or glass panels. It also helps keep a straight, clean line around the frame.

  3. Apply the sealant

    To open your door sealant, cut at an angle. The angled cut provides more control over the bead. How high up the tube you cut determines how thick the bead is.

    After cutting the tip, puncture the inner seal.

    A door frame is a big job and may require some reaching. Using a cartridge in a caulk gun will give you the best grip and results.

    Apply the silicone door sealant in a small, steady bead the size of the gap you are sealing. After applying the bead, run a gloved finger across it to help it fully adhere.

  4. Allow ample time to dry

    Silicone sealant has varying dry times, so always check your brand’s specific dry time.

    A quality sealant like GE helps protect your door by being rain-ready in just 30 minutes. You don’t need to sweat the weather, even as the sealant cures as rain won’t hurt it after that thirty-minute mark. Its total cure time is about 24 hours. After that time, it has reached its maximum strength.

  5. Regularly maintain the area

    Because door frame sealant is exposed to the elements, it will degrade over time. Quality sealants may last the lifetime of the door.

    To help prolong the sealant’s lifespan, inspect the door for damage and grime buildup. If there is dirt building up, clean the area thoroughly. If you need to reapply the sealant, remove the old sealant first before adding the new one.

Is your door frame ready for all types of weather and pests? Seal those small gaps before they become large, costly repairs to enjoy your warm, safe home interior. GE sealant wards off any pest outside your door that threatens to disrupt that peace.

Find a store near you that carries GE sealant’s silicone door sealant.

Contact Form

Important Steps to Winterize Your Home

Note: This DIY article is provided as a general guide only and is not intended to take the place of product-specific installation procedures; always follow applicable manufacturers’ instructions. Depending on your home’s age and condition, location within the home, and other potential factors, repairs and/or upgrades or other services may be necessary prior to the beginning and/or completion of your project that may involve the services of a home improvement professional. This article does not include advice pertaining to local building codes and/or any related inspections

It’s never too early to start thinking about winterizing your home. Ensuring your home is properly sealed not only keeps winter weather outside where it belongs, but it contributes to long-term home energy savings on your heating and cooling costs. Here are some ways to make sure your home is prepared for winter.

CHOOSE THE RIGHT SEALANT

The GE Sealants & Adhesives lineup offers a variety of caulks and sealants that can seal those gaps and cracks in your home that can lead to air infiltration, water damage and more.

Silicone sealants are a great choice because they’re 100% waterproof and extremely flexible, allowing them to withstand extreme weather. All Purpose Silicone 1® sealant creates a permanently waterproof, flexible and shrink and crack-proof seal. Plus, it can be same-day rain-ready1. If you’re looking for something with low odor and a shorter time for water exposure, Advanced Silicone 2® Window & Door sealant can be water-ready in as little as 30 minutes and offers 10-year mold-free protection2.

Should you need a paintable finish, Paintable Silicone Supreme Window & Door Sealant creates a strong, waterproof seal that can be paint-ready in as little as 30 minutes3.

APPLY THE SEALANT TO VULNERABLE AREAS

Now that you have chosen the sealant that fits your needs, it’s time for application. Start by inspecting the outside of the home: windows, doors, flashing and exterior trim. If these areas aren’t properly sealed, cold air and moisture can get in.

Before applying any new sealant, be sure to clean and remove any old sealant and make sure the surface is clean of paint, dirt, rust, mold and moisture.

Next, insert sealant into caulk gun and apply a steady bead that runs the length of the crevice and repeat. Finally, don’t forget to inspect your basement or attic for cracks and gaps as well. While you may not go into either very often, they’re prone to similar exposure.

OTHER WAYS TO WINTERIZE YOUR HOME

Sealing your home is a priority for tackling the winter weather, but there are other steps you can take along the way. For example:

  • Ensure your home is properly insulated
  • Use a smart thermostat to keep temperatures regulated
  • Put a cover over your water heater to retain heat
  • Ask your energy provider to conduct an energy audit.

These are simple ways to help winterize your home that can add up into savings.

Staying warm in the winter doesn’t have to be costly. Start by using the right sealants around your home and then follow through on other important ways that you can keep the heat in and the cold out.

Looking for more DIY project ideas? Visit our Projects & How To’s page for more.

Contact Form

How to Seal Your Crown Molding Like A Pro

  1. USE THE RIGHT SEALANT BEFORE YOU PAINT MOLDING AND TRIM FOR BEAUTIFUL RESULTS.
    For these kinds of projects, Max Shield Painter’s Siliconized Acrylic Latex Sealant is an excellent choice, ideal for tough paint projects both indoors and outdoors. This best-in-class paintable sealant offers durable, long-lasting results, backed by Tri-Shield Protection: extreme flexibility, 100% waterproof and mold resistance1.And, for paint projects that might be exposed to moisture, Paintable Silicone All Projects Kitchen & Bath Sealant is 100% weatherproof and has 10-year mold-free product protection1. And, its shrink and crack-proof formula can be paint-ready in just 30 minutes2.
  2. OPEN THE TUBE AND SEAL.
    Cut nozzle of your cartridge to the desired bead size. Pierce inner seal with seal punch found on most caulk guns. Insert cartridge into caulk gun. Squeeze with even, consistent pressure in order to control the rate the sealant that is dispensed from the cartridge. TIP: Apply masking tape to either side of a joint to create a straight edge before applying caulk to your molding, trim or baseboards.
  3. FILL EDGES AND GAPS.
    Apply sealant along the edges and joints of your molding, trim or baseboards. TIP: Seal molding and trim from top to bottom. Start by laying a bead on the top edge of your molding, then work your way down to avoid smudging your fresh caulk/sealant.
  4. SMOOTH THE SEAL.
    Use a gloved finger or caulk-smoothing tool to smooth caulk into joint within two to five minutes.
    TIP:
    If you applied masking tape in the previous step, remove immediately after smoothing the seal.
  5. CLEAN UP.
    Before the sealant cures, wipe away excess from surface and tools with a dry cloth. Let dry completely, typically within 24 hours, unless your sealant is 30-minute paint-ready (like Paintable Silicone Supreme Window & Door).If you’re tackling a sealing project, let GE Sealants & Adhesives help you get the job done right. Learn more from our other projects and how to’s for more tips and information.

Contact Form

How to Seal Trim in 6 Easy Steps

Your home’s trim might include molding, crown molding, chair rail, door and window casings, baseboards and more. Whether you’re installing one of these types of trim for the first time or preparing to repaint existing trim, it’s important to seal it first to get seamless, professional-looking results. Sealing around trim isn’t just for looks, though—it can also help prevent unwanted air flow and drafts from an attic or from the exterior of the house. If your trim has old sealant that’s cracked and peeling, it’s time to reseal it. Following this guide will teach you how to seal trim step-by-step.

Tools & Supplies for Sealing Trim

Picking the right caulk can make all the difference. For sealing trim or any dry area you plan to paint after sealing, choose a GE-branded siliconized acrylic caulk, like GE Painter’s Pro caulk. This caulk has the strong adhesion and flexibility you need for a successful paint project, and it’s paint-ready in as little as 30 minutes1 or immediately spray-paint-ready. GE Painter’s Pro caulk also comes with a 50-year limited durability guarantee,2 which means you won’t have to seal your trim again for a long time.

Besides a GE-branded caulk, you will also need:

  • Caulk gun
  • Painter’s tape
  • Latex gloves
  • Soapy water
  • Paper towels
  • Utility blade
  • Caulk tool
  • Isopropyl alcohol

After you gather the supplies you need and the right GE-branded caulk for your trim project, you’re ready to start sealing:

  1. Start with a Clean Surface

    Whenever you start a new sealing project, make sure you have a clean work surface by wiping it down with isopropyl alcohol. If you’re replacing old caulk or sealant, completely remove it first, then wipe down the area with isopropyl alcohol. Let the surface dry before laying a new bead.

  2. Apply Painter’s Tape

    For a smoother bead and easier cleanup, apply painter’s tape on either side of the area you’re caulking.

  3. Carefully Cut the Caulk Cartridge

    Next, prepare your caulk by cutting the tip of the cartridge. Cut the cartridge tip at a 45-degree angle. Some caulk guns have a tool to cut the cartridge tip, but we recommend using a utility blade for consistently clean results. Cut off less than you think you’ll need because you can always cut more. Once cut, pierce the cartridge’s inner foil seal using the metal rod on your caulk gun or a long nail. Then load the sealant cartridge into the caulk gun.

  4. Apply Caulk

    Now you can start applying the caulk. When caulking wall trim, start at one end of the wall and work your way to the other end. Pull the gun toward you and maintain a relaxed, confident grip and steady speed to apply the bead smoothly. If you can’t make it in one pass, it’s ok to readjust your grip and start where you left off. Fill any additional gaps as needed. When sealing around interior door or window casings, start sealing at the top and work your way down.

    Repeat this process for the entire perimeter of the trim you’re sealing.

  5. Tool the Bead & Remove the Painter’s Tape

    Use a caulk tool or your finger to tool the caulk bead until it’s smooth. It’s important to tool the bead before the caulk starts to dry, so if you need to, you can tool in sections. Run a bead of caulk, tool the bead, then repeat as many times as needed.

    Pro Tip: To aid in tooling, dip your finger in a mixture of dish soap and water.

    Immediately remove the painter’s tape before the caulk has a chance to dry. Carefully remove any excess or unwanted caulk with a damp cloth.

  6. Let Caulk Dry Completely

    Finally, allow the caulk to dry completely for the best performance. GE Painter’s Quick Dry caulk is paint-ready in 30 minutes1 and fully dry in 24 hours, but check your product for specific drying and curing instructions. Now your trim is sealed to last and prepped for you to paint. For more step-by-step sealing tutorials with high-performing GE-branded caulks and sealants, check out our other How-To guides.

1Sealant can be spray-painted immediately and brush- and roller-painted in as little as 30 minutes with bead size max 3/16″, temperature minimum of 65°F, and humidity minimum 50 percent. Otherwise, sealant should not be painted for 30-minutes. Apply paint with reduced applicator pressure to avoid disturbing the sealant. Paintable Silicone Sealant works well with most water-based acrylic paints. Sealant is not recommended with oil-based paints. If oil-based paints are used, test apply an acrylic primer and paint in a small, inconspicuous area.

2Manufacturer warrants that this product, when used as directed, will meet the above specifications for as long as you own your home. If not satisfied, return proof of purchase for refund. This is the sole and exclusive remedy and Manufacturer shall not be liable for any damages in excess of the purchase price. This warranty is in lieu of all other warranties, express or implied, including any warranty of merchantability or fitness.

Contact Form

How to Seal Exterior Window Trim to Last

Knowing how to seal exterior window trim will help keep your home protected against rain, snow, drafts and more. When left unsealed or left with old degrading sealant, the gaps between your home’s window trim and siding can let leaks, humidity, airflow and even pests into your home. Sealing around windows is also one way to help keep your home energy efficient and maybe even lower your heating and cooling bills.

Tools & Supplies for Sealing Windows

Picking the right sealant for your project can make all the difference. For sealing exterior window trim, or anywhere that could be exposed to water and harsh weather, choose a GE-branded 100% silicone sealant, like GE Advanced Silicone 2® Window & Door sealant or GE Supreme Silicone Window & Door sealant. Both sealants are 100% weatherproof, permanently flexible and won’t crack or shrink with temperature changes. Plus, they offer mold-free product protection1 so your windows are protected against mold and mildew too.

Pro Tip: 100% silicone sealants are not paintable so be sure to pick a color that matches your home’s exterior. ​​GE Advanced Silicone 2® Window & Door sealant and GE Supreme Silicone Window & Door sealant are available in six different colors: almond, black, brown, clear, light gray and white.

Besides a GE-branded 100% silicone sealant, you will also need:

  • Caulk gun
  • Painter’s tape
  • Latex gloves
  • Soapy water
  • Paper towels
  • Stiff bristle brush
  • Utility blade
  • Caulk tool
  • Mineral spirits
  • Isopropyl alcohol

With your tools and GE-branded 100% silicone sealant in hand, you’re ready to learn how to seal exterior window trim so it’s weatherproof and durable for seasons to come:

  1. Start with a Clean Surface

    Whenever you start a new sealing project, make sure you have a clean work surface by wiping it down with isopropyl alcohol. If you’re replacing a seal, completely remove the old caulk or sealant, then wipe down the area with isopropyl alcohol. Let the surface dry before laying a new bead.

    Safety Tip: Make sure your work area is well ventilated when using isopropyl alcohol.

    Applying painter’s tape on either side of the area you’re sealing can help create a smoother bead and easier cleanup. However, depending on your home’s siding and how wide the gaps between it and the trim are, it may be better to rely solely on your own steady hand.

  2. Carefully Cut the Sealant Cartridge

    Next, prepare your sealant by cutting the tip of the cartridge. Cut the cartridge tip at a 45-degree angle. Some caulk guns have a tool to cut the cartridge tip, but we recommend using a utility blade for consistently clean results. Cut off less than you think you’ll need because you can always cut more. Once cut, pierce the cartridge’s inner foil seal using the metal rod on your caulk gun or a long nail. Then load the cartridge into the caulk gun.

  3. Apply Sealant

    Now it’s time to start sealing. Maintain a relaxed, confident grip and steady speed as you apply the sealant. Run a bead between the window trim and the home’s siding, starting from the top corner and working down to the bottom corner. If you can’t make it in one pass, it’s ok to readjust your grip and start where you left off.

    Repeat along the opposite side, and fill gaps with additional sealant as needed.

    Remember to seal along the bottom of the window too.

  4. Tool the Bead

    Use a caulk tool or your finger to tool the sealant bead until it’s smooth. Because it’s important to tool the bead before the sealant starts to cure, it may be better to work in sections. Run a bead of sealant along one side of the trim, tool the bead, then continue applying sealant on the next side.

    Pro Tip: To aid in tooling, dip your finger in a mixture of dish soap and water.

  5. Remove Painter’s Tape & Let Sealant Cure Completely

    If you used painter’s tape, immediately remove it before the sealant has a chance to cure. Remove any excess or unwanted sealant with mineral spirits.Then finally, allow the sealant to cure completely for the best performance. Both GE Advanced Silicone 2® Window & Door sealant and GE Supreme Silicone Window & Door sealant are water-ready in 30-minutes2 and fully cured in 24-hours, but check your product for specific curing instructions.

    Now your exterior windows are weatherproof and ready to weather the storm for years to come. For more step-by-step sealing tutorials with high-performing GE-branded sealants, check out our other How-To guides.

1 Cured sealant is resistant to stain causing mold and mildew. Regular cleaning of the cured sealant is required, however, as soap and other residue can cause secondary mold and mildew growth.

2 Exposure to water possible in as little as 30 minutes with bead size max 3/16””, temperature min 65oF and humidity min 50%. Otherwise, sealant should not be exposed to water for 8 hours. Do not touch or clean sealant for 24 hours. 


Contact Form

How to Seal Around the Exterior of a Door Properly

When left unsealed, the gaps between your door frame or trim and your home’s siding can let in water, drafts and pests, so it’s important to know how to seal a door frame properly. If you notice your old door sealant is cracked, degrading or damaged, then it’s time to replace it. A new, 100% silicone seal will help keep your home weatherproof, pest-resistant and potentially more energy-efficient.

Tools & Supplies for Sealing Doors

Picking the right sealant for your project can make all the difference. For sealing around the exterior of a door, or anywhere that could be exposed to water and harsh weather, choose a GE-branded 100% silicone sealant, like GE Supreme Silicone Window & Door sealant. This sealant is 100% weatherproof, permanently flexible and won’t crack or shrink with temperature changes. It also offers lifetime mold-free product protection1 so your door sealant will be protected against mold and mildew too.

 Pro Tip: 100% silicone sealants are not paintable so be sure to pick a color that matches your home’s exterior. ​​

Besides a GE-branded 100% silicone sealant, you will also need:

  • Caulk gun
  • Painter’s tape
  • Latex gloves
  • Soapy water
  • Paper towels
  • Stiff bristle brush
  • Utility blade
  • Caulk tool
  • Mineral spirits
  • Isopropyl alcohol

Once you have your tools and GE-branded 100% silicone sealant, you’re ready to learn how to seal a door frame to keep out weather, drafts and pests:

  1. Start with a Clean Surface

    Whenever you start a new sealing project, make sure you have a clean work surface by wiping it down with isopropyl alcohol. If you’re replacing a seal, completely remove the old caulk or sealant, then wipe down the area with isopropyl alcohol. Let the surface dry before laying a new bead.

    Safety Tip: Make sure your work area is well ventilated when using isopropyl alcohol.

    Applying painter’s tape on either side of the area you’re sealing can help create a smoother bead and easier cleanup. However, depending on your home’s siding and how wide the gaps between it and the door are, it may be better to rely solely on your own steady hand.

  2. Carefully Cut the Sealant Cartridge

    Next, prepare your sealant by cutting the tip of the cartridge. Cut the cartridge tip at a 45-degree angle. Some caulk guns have a tool to cut the cartridge tip, but we recommend using a utility blade for consistently clean results. Cut off less than you think you’ll need because you can always cut more. Once cut, pierce the cartridge’s inner foil seal using the metal rod on your caulk gun or a long nail. Then load the cartridge into the caulk gun.

  3. Apply Sealant

    Now apply the sealant. Maintain a relaxed, confident grip and steady speed as you apply the sealant. Run a bead between the door frame and the home’s siding, starting from the top corner and working down to the bottom corner. If you can’t make it in one pass, it’s ok to readjust your grip and start where you left off.

    Repeat along the opposite side, and fill gaps with additional sealant as needed.

    Seal around everywhere there are gaps between the frame or casing of the door and the rest of the house, including the door sill.

  4. Tool the Bead

    Use a caulk tool or your finger to tool the sealant bead until it’s smooth. Because it’s important to tool the bead before the sealant starts to cure, it may be better to work in sections. Run a bead of sealant along one side of the door frame, tool the bead, then continue applying sealant on the next side.

    Pro Tip: To aid in tooling, dip your finger in a mixture of dish soap and water.

  5. Remove Painter’s Tape & Let Sealant Cure Completely

    If you used painter’s tape, immediately remove it before the sealant has a chance to cure. Remove any excess or unwanted sealant with mineral spirits.

    Finally, allow the sealant to cure completely for the best performance. GE Supreme Silicone Window & Door sealant is water-ready in 30-minutes2 and fully cured in 24-hours, but check your product for specific curing instructions.

    Now your exterior door has a 100% weatherproof seal that’s made to last. For more step-by-step sealing tutorials with high-performing GE-branded sealants, check out our other How-To guides.

1Cured sealant is resistant to stain causing mold and mildew. Regular cleaning of the cured sealant is required, however, as soap and other residue can cause secondary mold and mildew growth.

2Exposure to water possible in as little as 30 minutes with bead size max 3/16””, temperature min 65oF and humidity min 50%. Otherwise, sealant should not be exposed to water for 8 hours. Do not touch or clean sealant for 24 hours.

Contact Form

How to Remove Old Sealant the Right Way

When tackling renovations or just replacing old sealant, you’ll need to first prepare your work surface. Over time, caulks and sealants can wear down, grow mold, discolor, and shrink. This creates cracks that water, weather and pests can get through. Unless you’re refreshing 100% silicone seals with GE Re-New, old caulk or sealant needs to be completely removed before you can apply new sealant.

To remove sealant, you’ll need: a utility blade, caulking tool, isopropyl alcohol and paper towels.

  1. Score Old Sealant

    First, carefully score the seam of the old sealant with a utility blade. Run the blade along the edge of the old sealant, being cautious not to scratch the surface of whatever you plan to re-seal.

  2. Remove Old Sealant

    After scoring the old sealant, try to remove as much of the old sealant as you can by hand. Use a caulking tool to remove any remaining material.

    For tight corners where your fingers or a caulking tool won’t fit, use the utility blade again to carefully scrape off the sealant.

  3. Clean Surface with Isopropyl Alcohol

    Once you’ve removed as much of the old sealant material as possible, clean up any remaining residue, dust and debris using isopropyl alcohol. Dampen a paper towel with the alcohol, then wipe down your entire work surface. This step is important for making sure the new sealant you apply will adhere properly.

    If the old sealant had mold, clean the area with a mold cleaning solution prior to wiping down with isopropyl alcohol.

    Safety Tip: Make sure your work area is well ventilated when using isopropyl alcohol.

  4. Allow Work Surface to Dry

    Finally, allow your work surface to dry completely before you apply any new sealant. After this step, you’re ready for a successful sealing project.

    To avoid removing old sealant again any time soon, create your next seal with a high-performing GE-branded silicone sealant that’s backed by a lifetime guarantee¹ like GE Advanced Silicone 2® or GE Supreme Silicone. Check out our other How-To Guides for more step-by-step tutorials that will help with your next sealing project.

1Manufacturer warrants that this product, when used as directed, will meet the above specifications for as long as you own your home. If not satisfied, return proof of purchase for refund. This is the sole and exclusive remedy and Manufacturer shall not be liable for any damages in excess of the purchase price. This warranty is in lieu of all other warranties, express or implied, including any warranty of merchantability or fitness.