Note: This DIY article is provided as a general guide only and is not intended to take the place of product-specific installation procedures; always follow applicable manufacturers’ instructions. Depending on your home’s age and condition, location within the home, and other potential factors, repairs and/or upgrades or other services may be necessary prior to the beginning and/or completion of your project that may involve the services of a home improvement professional. This article does not include advice pertaining to local building codes and/or any related inspections.
Waterproofing your kitchen and bathroom with silicone sealant can seem daunting, but with the right tips and techniques, even beginners can achieve professional-quality results. In this blog, we’ll guide you through the process of using silicone kitchen and bath sealant to protect these essential areas from moisture and mould.
12 essential tips for using silicone kitchen and bath sealant
Whether you’re tackling a small touch-up or a larger project, our step-by-step tips will help you apply sealant smoothly and effectively. From preparing the surface to ensuring a clean finish, you’ll learn how to handle every aspect of the job with confidence. Let’s get started on making your kitchen and bathroom waterproof and durable.
-
Clean the surface
Before applying silicone sealant, ensure the surface is thoroughly cleaned. Remove any dirt, grease, soap scum, or old sealant using a mild cleaner and a scrub brush. Rinse the area with water and let it dry completely. Any remaining residue can prevent the sealant from adhering properly and leave behind gaps and leaks.
-
Choose the right sealant
Selecting the appropriate silicone sealant is essential for effective waterproofing.
Selecting the appropriate silicone sealant is essential for effective waterproofing. For kitchens and bathrooms, use a sealant specifically designed for these areas — such as Advanced Silicone 2® Kitchen & Bath Sealant — as they offer enhanced mould and mildew resistance. These sealants are formulated to withstand the high humidity and temperature fluctuations common in these spaces. Read product labels carefully to ensure you’re choosing a high-quality sealant that matches your needs, providing durability and longevity for your sealing project.
-
Prepare the sealant tube
Getting a smooth, consistent application begins with properly preparing the sealant tube. Start by cutting the nozzle at a 45-degree angle and match the width of the gap you’re sealing. A small, precise cut allows for better control. You can puncture the inner seal of the tube with a pin or nail. Load the tube into a caulking gun and you’re ready to start applying the sealant.
-
Use painter's tape
Using painter’s tape on either side of the seam creates clean, professional-looking lines. It also means you don’t have to be overly self-conscious about having a steady hand during application. Apply the tape parallel to the seam and leave a small gap for the sealant. This prevents excess sealant from spreading onto surrounding surfaces and makes cleanup easier. Once you’ve applied and tooled the sealant, remove the tape before the sealant dries.
-
Apply sealant smoothly
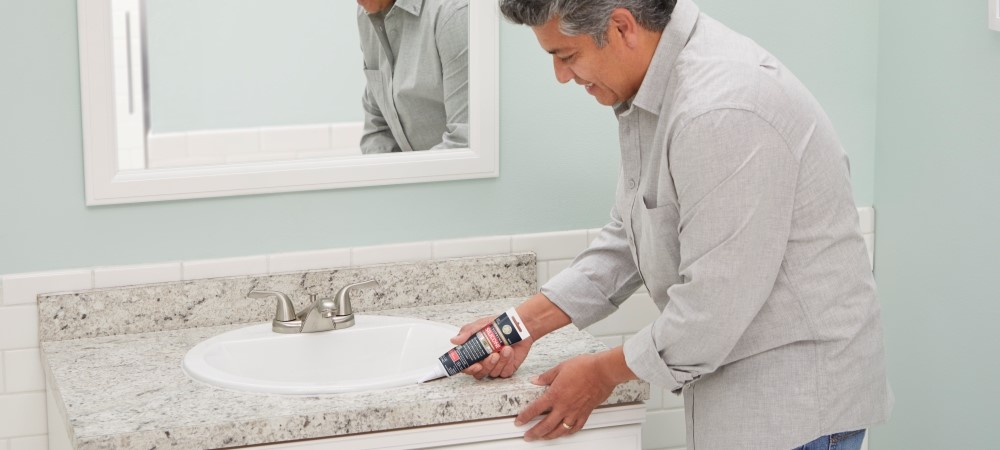
Try to apply the sealant in a smooth, continuous motion. Hold the caulking gun at a consistent angle and squeeze the trigger steadily to maintain an even bead of sealant. Move slowly enough to create coverage without gaps or breaks. Also, avoid stopping and starting if you can, as it’s difficult to restart a line without a gap or an overlap.
-
Tool the sealant
Tooling — reshaping uncured sealant — is a necessary step for getting a smooth, even finish and proper adhesion. Immediately after applying the sealant, use a caulking tool or a wet finger to press and shape the sealant into the seam. The pressure helps to fill any gaps and facilitates a tight bond with the surface. Keep a damp cloth nearby to wipe off excess sealant from your smoothing tool or finger.
-
Check for gaps
After applying and tooling the sealant, carefully inspect your seam for any missed spots or air bubbles. These gaps can compromise the waterproofing and lead to leaks. If you find any, apply a small amount of sealant to the affected areas and smooth it out with your smoothing tool or finger.
-
Remove excess sealant

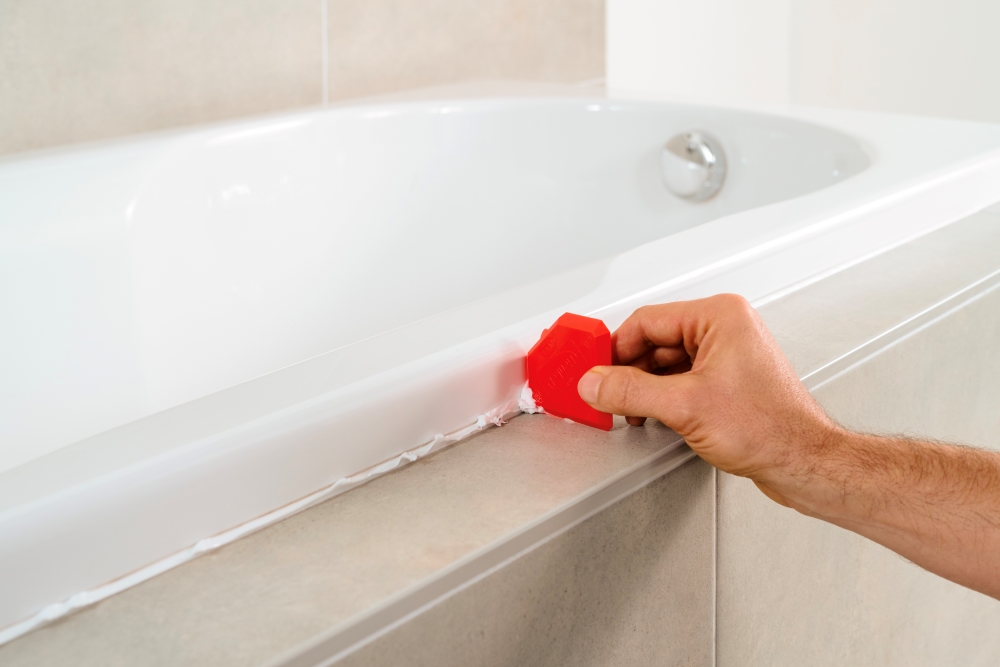
A homeowner wiping off excess sealant from the edges of a bathtub. Before the sealant cures, remove any excess — streaks along the edges or lumps in the seam — to leave a neat finish. You can use a damp cloth or a plastic scraper to wipe away surplus sealant. Just take care not to disturb the bead. Additionally, removing excess sealant while it’s still wet is much easier than coming back to the task after it has fully cured.
-
Allow proper curing time
Typically, silicone kitchen and bath sealant requires 24-48 hours to cure fully. When water and other solvents evaporate from the surface of the sealant, it will feel dry to the touch. However, the interior of the sealant bead will still require additional time to fully set or cure.
During this period, avoid exposing the sealed area to water or mechanical stress. Proper curing ensures the sealant forms a strong, durable bond and provides long-lasting waterproof protection. Rushing this step may leave you with a poorly bonded seal.
-
Ventilate the area
Providing adequate ventilation during and after applying sealant speeds up the curing process and reduces your exposure to fumes. Open windows and use fans to circulate air, especially in enclosed spaces like bathrooms.
-
Regular inspection
Even if you’re satisfied with the job after curing, you’ll still need to periodically inspect sealed areas to ensure they remain intact and effective. Look for signs of wear, cracks, or gaps that could compromise the waterproofing. Regular checks — especially in showers and sinks — help catch potential issues early. If you notice any damage, reapply a bit of fresh sealant.
-
Store sealant properly
After use, tightly reseal the tube and store it in a cool, dry place away from direct sunlight and extreme temperatures. This prevents the sealant from drying out and becoming less effective. Keeping the nozzle clean and covered can also help maintain the sealant’s quality. Proper storage practices save you money in the long run and ensure you always have sealant ready for touch-ups.
To get GE sealant products for your home improvement project, visit these retailers.


