Your home’s trim might include molding, crown molding, chair rail, door and window casings, baseboards and more. Whether you’re installing one of these types of trim for the first time or preparing to repaint existing trim, it’s important to seal it first to get seamless, professional-looking results. Sealing around trim isn’t just for looks, though—it can also help prevent unwanted air flow and drafts from an attic or from the exterior of the house. If your trim has old sealant that’s cracked and peeling, it’s time to reseal it. Following this guide will teach you how to seal trim step-by-step.
Tools & Supplies for Sealing Trim
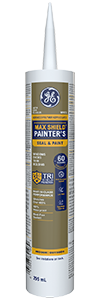
Picking the right caulk can make all the difference. For sealing trim or any dry area you plan to paint after sealing, choose a GE-branded siliconized acrylic caulk, like GE Painter’s Pro caulk. This caulk has the strong adhesion and flexibility you need for a successful paint project, and it’s paint-ready in as little as 30 minutes1 or immediately spray-paint-ready. GE Painter’s Pro caulk also comes with a 50-year limited durability guarantee,2 which means you won’t have to seal your trim again for a long time.
Besides a GE-branded caulk, you will also need:
- Caulk gun
- Painter’s tape
- Latex gloves
- Soapy water
- Paper towels
- Utility blade
- Caulk tool
- Isopropyl alcohol
After you gather the supplies you need and the right GE-branded caulk for your trim project, you’re ready to start sealing:
-
Start with a Clean Surface
Whenever you start a new sealing project, make sure you have a clean work surface by wiping it down with isopropyl alcohol. If you’re replacing old caulk or sealant, completely remove it first, then wipe down the area with isopropyl alcohol. Let the surface dry before laying a new bead.
-
Apply Painter’s Tape
For a smoother bead and easier cleanup, apply painter’s tape on either side of the area you’re caulking.
-
Carefully Cut the Caulk Cartridge
Next, prepare your caulk by cutting the tip of the cartridge. Cut the cartridge tip at a 45-degree angle. Some caulk guns have a tool to cut the cartridge tip, but we recommend using a utility blade for consistently clean results. Cut off less than you think you’ll need because you can always cut more. Once cut, pierce the cartridge’s inner foil seal using the metal rod on your caulk gun or a long nail. Then load the sealant cartridge into the caulk gun.
-
Apply Caulk
Now you can start applying the caulk. When caulking wall trim, start at one end of the wall and work your way to the other end. Pull the gun toward you and maintain a relaxed, confident grip and steady speed to apply the bead smoothly. If you can’t make it in one pass, it’s ok to readjust your grip and start where you left off. Fill any additional gaps as needed. When sealing around interior door or window casings, start sealing at the top and work your way down.
Repeat this process for the entire perimeter of the trim you’re sealing.
-
Tool the Bead & Remove the Painter’s Tape
Use a caulk tool or your finger to tool the caulk bead until it’s smooth. It’s important to tool the bead before the caulk starts to dry, so if you need to, you can tool in sections. Run a bead of caulk, tool the bead, then repeat as many times as needed.
Pro Tip: To aid in tooling, dip your finger in a mixture of dish soap and water.
Immediately remove the painter’s tape before the caulk has a chance to dry. Carefully remove any excess or unwanted caulk with a damp cloth.
-
Let Caulk Dry Completely
Finally, allow the caulk to dry completely for the best performance. GE Painter’s Quick Dry caulk is paint-ready in 30 minutes1 and fully dry in 24 hours, but check your product for specific drying and curing instructions. Now your trim is sealed to last and prepped for you to paint. For more step-by-step sealing tutorials with high-performing GE-branded caulks and sealants, check out our other How-To guides.
1Sealant can be spray-painted immediately and brush- and roller-painted in as little as 30 minutes with bead size max 3/16″, temperature minimum of 65°F, and humidity minimum 50 percent. Otherwise, sealant should not be painted for 30-minutes. Apply paint with reduced applicator pressure to avoid disturbing the sealant. Paintable Silicone Sealant works well with most water-based acrylic paints. Sealant is not recommended with oil-based paints. If oil-based paints are used, test apply an acrylic primer and paint in a small, inconspicuous area.
2Manufacturer warrants that this product, when used as directed, will meet the above specifications for as long as you own your home. If not satisfied, return proof of purchase for refund. This is the sole and exclusive remedy and Manufacturer shall not be liable for any damages in excess of the purchase price. This warranty is in lieu of all other warranties, express or implied, including any warranty of merchantability or fitness.

