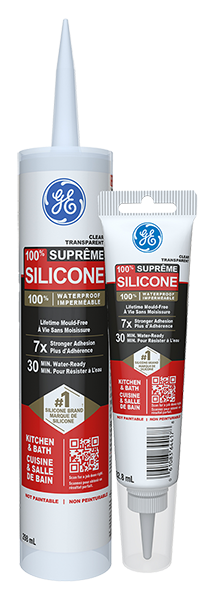
If your shower has cracked, moldy or damaged seals, it might be time to replace the sealant. Not only does it look unpleasant, but old shower sealant that’s cracked or peeling away from the surface can let water and humidity into your walls, which can cause serious problems like mold, mildew and rot. Prevent these problems before they start by replacing damaged sealant with a new, 100% silicone seal.
Tools & Supplies for Sealing Showers
Picking the right sealant can make all the difference. For sealing a shower, or anywhere water could be present, choose a GE-branded 100% silicone sealant, like GE Supreme Silicone Kitchen & Bath sealant. This sealant is 100% waterproof, permanently flexible, has lifetime mold-free product protection1 and excellent adhesion for a watertight, mold-resistant seal.
Pro Tip: 100% silicone sealants are not paintable so be sure to pick the appropriate color for your project.
Besides a GE-branded 100% silicone sealant, you will also need:
- Caulk gun
- Painter’s tape
- Latex gloves
- Soapy water
- Paper towels
- Utility blade
- Caulk tool
- Mineral spirits
- Isopropyl alcohol
Once you’ve gathered the tools and supplies you need for your project, follow these steps to learn how to seal a shower so it’s waterproof, mold-resistant and beautiful for years to come:
-
Start with a Clean Surface
Whenever you start a new sealing project, make sure you have a clean work surface by wiping it down with isopropyl alcohol. If you’re replacing a seal, completely remove the old caulk or sealant, then wipe down the area with isopropyl alcohol. Let the surface dry before laying a new bead.
Safety Tip: Make sure your work area is well ventilated when using isopropyl alcohol.
-
Apply Painter’s Tape
For a smoother bead and easier cleanup, apply painter’s tape on either side of the area you’re sealing.
-
Carefully Cut the Sealant Cartridge
Next, prepare your sealant by cutting the tip of the cartridge. Cut the cartridge tip at a 45-degree angle. Some caulk guns have a tool to cut the cartridge tip, but we recommend using a utility blade for consistently clean results. Cut off less than you think you’ll need because you can always cut more. Once cut, pierce the cartridge’s inner foil seal using the metal rod on your caulk gun or a long nail. Then load the cartridge into the caulk gun.
-
Apply Sealant
Now it’s time to start sealing. Maintain a relaxed, confident grip and steady speed as you apply the sealant, beginning at the top joint of the shower edge and working your way down. Then repeat the process on all other shower joints. If you can’t seal an entire joint in one pass, it’s ok to readjust your grip and start where you left off. Fill gaps with additional sealant as needed.
-
Tool the Bead & Remove the Painter’s Tape
Use a caulk tool or your finger to tool the sealant bead until it’s smooth. Because it’s important to tool the bead before the sealant starts to cure, it may be better to work in sections. Run a bead of sealant along one joint, tool the bead, then continue applying sealant on the next joint.
Pro Tip: To aid in tooling, dip your finger in a mixture of dish soap and water.
Then, immediately remove the painter’s tape before the sealant has a chance to cure. Remove any excess or unwanted sealant with mineral spirits.
-
Let Sealant Cure Completely
Finally, allow the sealant to cure completely for the best performance. GE Supreme Silicone Kitchen & Bath sealant is water-ready in 30-minutes2 and fully cured in 24-hours, but check your product for specific curing instructions.
Now you can enjoy a properly sealed, watertight shower. For more step-by-step sealing tutorials with high-performing GE-branded sealants, check out our other How-To guides.
1Cured sealant is resistant to stain causing mold and mildew. Regular cleaning of the cured sealant is required, however, as soap and other residue can cause secondary mold and mildew growth.
2Exposure to water possible in as little as 30 minutes with bead size max 3/16””, temperature min 65oF and humidity min 50%. Otherwise, sealant should not be exposed to water for 8 hours. Do not touch or clean sealant for 24 hours.

