Note: This DIY article is provided as a general guide only and is not intended to take the place of product-specific installation procedures; always follow applicable manufacturers’ instructions. Depending on your home’s age and condition, location within the home, and other potential factors, repairs and/or upgrades or other services may be necessary prior to the beginning and/or completion of your project that may involve the services of a home improvement professional. This article does not include advice pertaining to local building codes and/or any related inspections.
If you own and maintain a home, chances are you’ll need to learn how to caulk — along with when and where — at some point. Proper caulking can prevent leaks, improve energy efficiency, and give fixtures and surfaces in your home a neat, professional appearance. By sealing gaps and cracks, caulk helps to maintain a comfortable indoor environment and protect your property from water damage and drafts.
Materials and tools needed to caulk like a pro
This is a comprehensive guide to caulking that includes a list of tools and materials, preparation steps, and caulking tips and tricks for achieving a professional finish. Whether you’re sealing windows, doors, or baseboards, understanding how to apply caulk correctly will help you get the job right the first time. Additionally, this guide explains the differences between acrylic caulk and silicone sealant to help you choose the right product for various tasks around your home. With the right knowledge and skills, you can tackle caulking projects with confidence and achieve professional-grade results.
Before you begin any sealing project, gather the right materials and tools. The key items you’ll need are:
- Caulk: Choose the appropriate type for your project. Silicone sealant is ideal for non-porous surfaces like glass and metal, while acrylic caulk works well on wood and drywall.
- Caulk gun: A quality caulk gun helps deliver a consistent and controlled application. Look for one with smooth trigger action.
- Painter’s tape: Use painter’s tape to create clean, straight lines and prevent caulk from spreading onto unwanted areas.
- Utility knife: A sharp utility knife is necessary for cutting the caulk tube nozzle and removing old caulk.
- Caulking tool or spoon: These tools help to smooth applied caulk for a professional finish.
- Cleaning supplies: Have rags, a vacuum, or a brush on hand to clean the surface before applying new caulk.
Where to use acrylic caulk vs. where to use silicone sealant
Acrylic caulk is ideal for areas that require a rigid, paintable seal — areas like windows, doors, and baseboards. It effectively fills gaps and cracks and prevents drafts and moisture from entering your home. On the other hand, silicone sealant is more suitable for areas exposed to significant moisture and movement, such as bathrooms, kitchens, and exterior surfaces.
Acrylic caulk and silicone sealant serve similar purposes and may seem more or less interchangeable to first-time users. However, there are some important differences you need to know. Caulk is ideal for areas that require a rigid, paintable seal — areas like windows, doors, and baseboards. It effectively fills gaps and cracks and prevents drafts and moisture from entering your home.
On the other hand, sealant is more suitable for areas exposed to significant moisture and movement, such as bathrooms, kitchens, and exterior surfaces. Silicone sealant provides a flexible, waterproof seal that expands and contracts with the movement of sealed joints in these areas.
Knowing the difference between caulk and sealant will help you choose the right product for each task. By applying both caulk and sealant in their respective appropriate places, you can maintain your home for years to come.
How to seal: Preparation
Successful sealing starts with proper preparation. Start by thoroughly cleaning the surfaces where you will apply caulk. Use a vacuum or brush to remove any dust or dirt. For stubborn grime, a mild detergent solution can help. Once clean, make sure the area is completely dry, otherwise caulk may not adhere properly.
Next, remove any old caulk from the seams. A utility knife or a specialized caulk removal tool works great for this task. Carefully cut along the edges of the old caulk and peel it away by hand, taking care not to damage the surrounding surfaces.
Once the old caulk is removed, wipe down the area with a damp cloth to remove any remaining residue. Allow it to dry completely. Finally, apply your painter’s tape along the edges of the seam to create clean lines.
Loading and using the caulking gun
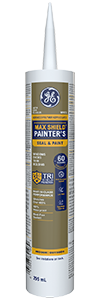
First, cut the nozzle of the caulk tube — we recommend Max® Shield Painter’s Pro for areas you intend to paint — at a 45-degree angle and try to match the opening to the size of the gap you need to fill. Smaller openings usually allow for more precise control.
Pierce the inner seal foil first. Then insert the caulk tube into the caulking gun, making sure it is securely in place. Press the release trigger to engage the plunger and the tube. Before you start on your intended surfaces, practice squeezing the trigger a few times to get a feel for the pressure needed to maintain a steady flow.
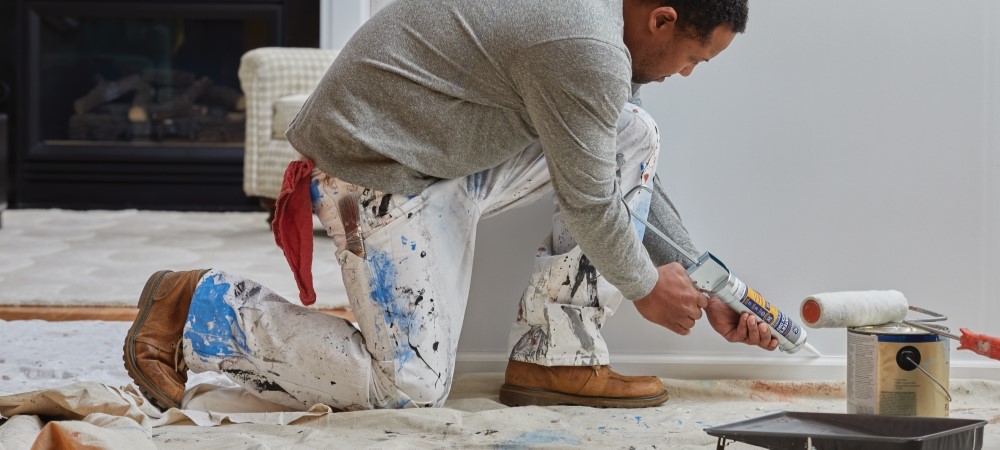
When you’re ready to apply caulk, hold the gun at a consistent 45-degree angle to the seam. Apply steady pressure on the trigger and run the gun smoothly along the joint. As much as possible, maintain consistent speed and pressure for more consistent results. After applying the caulk, use a caulking tool or your finger to smooth the bead.
Caulking tips and tricks
To achieve a professional finish when caulking, learn these best practices and common mistakes:
Best practices:
- Cut the nozzle correctly: Cut the nozzle at a 45-degree angle to control the flow and match the gap size.
- Test before applying: Practice on a piece of cardboard to get a feel for the caulking gun’s pressure and flow.
- Work in small sections: Apply caulk in manageable sections to maintain control and precision.
- Smooth immediately: Smooth the caulk immediately after application using a caulking tool or a wet glove finger.
Common mistakes to avoid:
- Skipping surface preparation: Always clean and dry the surface thoroughly before applying caulk.
- Applying too much caulk: Avoid overfilling gaps, as excess caulk can be difficult to smooth.
- Not smoothing caulk: Failing to smooth the bead leaves uneven and weak seals.
- Ignoring curing time: Allow the caulk to cure fully as per the manufacturer’s instructions before exposing it to moisture or paint.
To get GE products for your home improvement project, visit these fine retailers.


