Product Finder
Indoors
Outdoors

Contact Form

Discover renovations that could qualify you for a Tax Credit Multigenerational Home Renovation Tax Credit: can insulating your home save you money?

Note: This DIY article is provided as a general guide only and is not intended to take the place of product-specific installation procedures; always follow applicable manufacturers’ instructions. Depending on your home’s age and condition, location within the home, and other potential factors, repairs and/or upgrades or other services may be necessary prior to the beginning and/or completion of your project that may involve the services of a home improvement professional. This article does not include advice pertaining to local building codes and/or any related inspections.

Making home upgrades offers many benefits, from improved comfort to energy savings. While the federal Home Renovation Tax Credit (HRTC) expired in 2010, the Multigenerational Home Renovation Tax Credit (MHRTC) provides valuable financial incentives for eligible renovations. These projects, which include creating secondary units for seniors or adults with disabilities, can be supported by GE’s energy-efficient products. Let’s explore how to qualify and maximize savings.

Eligibility requirements for the Canada home renovation tax credit

To qualify for the Multigenerational Home Renovation Tax Credit for insulation, homeowners must meet the following criteria:

  • Eligible purpose: Renovations must create a secondary dwelling unit to accommodate seniors or adults with disabilities. These units must comply with building code requirements and prioritize accessibility.
  • Homeowner eligibility: Renovations must occur within the owner’s primary residence. Vacation homes, rental properties, and new constructions do not qualify.
  • Eligible expenses: Costs related to creating kitchens, bathrooms, and living spaces for secondary units are covered. Energy-efficient upgrades, such as insulation, may also qualify if they’re part of a broader renovation.
  • Credit cap: The MHRTC offers a 15% refundable tax credit on eligible expenses up to a maximum of $7,500.

To be eligible for the Multigenerational Home Renovation Tax Credit in Canada, the renovation must create a secondary dwelling unit within the owner’s primary residence. Vacation homes, rental units, and new constructions do not qualify. All renovations must meet building code requirements for secondary suites and accessibility.

Who qualifies for the Multigenerational Home Renovation Tax Credit?

Eligibility for the MHRTC in Canada focuses on homeowners making renovations to accommodate seniors or adults with disabilities. Key criteria include:

  • Purpose of renovations: Renovations must create or modify a secondary dwelling unit to meet building codes for multigenerational living. This may include adding accessible kitchens, bathrooms, or entrances.
  • Primary residence requirement: As noted earlier, renovations must take place within the owner’s primary residence. Vacation homes, rental properties, and new constructions do not qualify.

To ensure eligibility, homeowners should maintain detailed records, including receipts, contracts, and invoices. Supporting documentation like building permits and certification of compliance with local building codes may also be required. Consulting with a tax professional is strongly advised to clarify eligibility and ensure that all expenses align with MHRTC guidelines.

How to claim the Multigenerational Home Renovation Tax Credit in Canada

Follow these steps to successfully claim your MHRTC:

  • Plan eligible renovations: Identify upgrades eligible under the MHRTC. Focus on creating or modifying secondary dwelling units to meet building code and accessibility standards. Ensure renovations occur within your primary residence, as required for eligibility.
  • Verify eligible expenses: Review the CRA’s MHRTC guidelines to confirm your expenses qualify. Priority is given to structural modifications, safety enhancements, and accessibility improvements like kitchens, bathrooms, or entrances.
  • Keep detailed records: Save all receipts, invoices, contracts, and building permits to support your claim. Ensure that all documentation clearly shows the renovation’s purpose and compliance with building codes.
  • File your claim: Include eligible expenses under the Multigenerational Home Renovation Tax Credit section of your tax return. Calculate your credit at 15% of eligible expenses up to $50,000, for a maximum refundable credit of $7,500.
  • Consult a tax professional: If you have questions or want to maximize potential savings, consider consulting a tax professional. They can guide you on specific requirements and any provincial incentives that may complement the federal credit.

Potential savings from renovations with MHRTC

The Multigenerational Home Renovation Tax Credit in Canada can offset renovation costs by up to $7,500, making it easier for homeowners to create accessible secondary suites. These renovations not only enhance functionality but can also reduce long-term expenses through complementary energy-efficient upgrades.

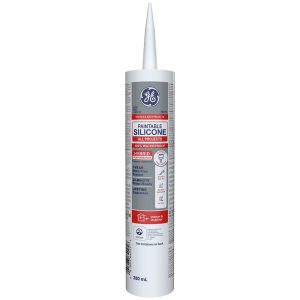
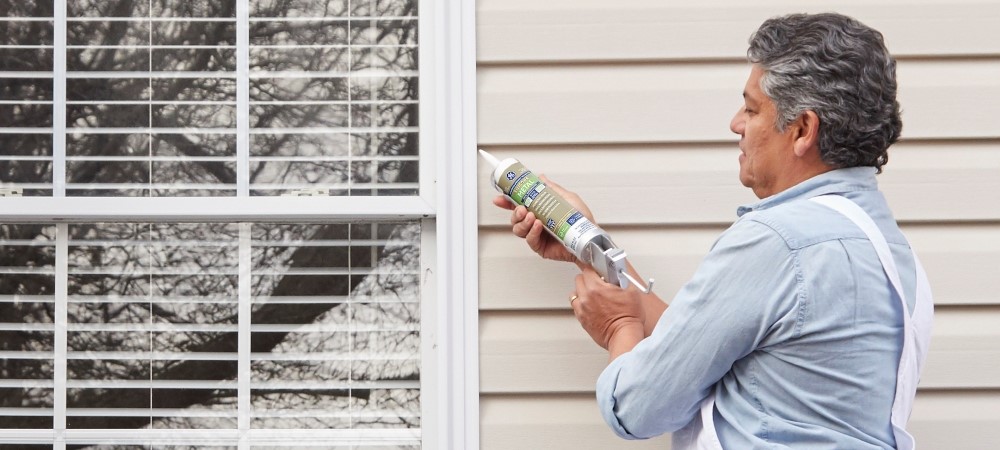
For example, ENERGY STAR® certified materials and products like GE’s Advanced Silicone 2® Window & Door Sealant can improve energy efficiency and durability. Combining these upgrades with MHRTC-eligible renovations ensures compliance with building codes while maximizing long-term savings.

GE Sealants’ products for MHRTC-compliant renovations

GE Sealants offers several products in Canada designed to support energy efficiency and durability during home renovations. For homeowners planning Multigenerational Home Renovation Tax Credit (MHRTC)-eligible projects, these products are essential for creating energy-efficient, weather-resistant spaces that meet building code requirements for multigenerational living. Here are two recommended products to consider when insulating your home:

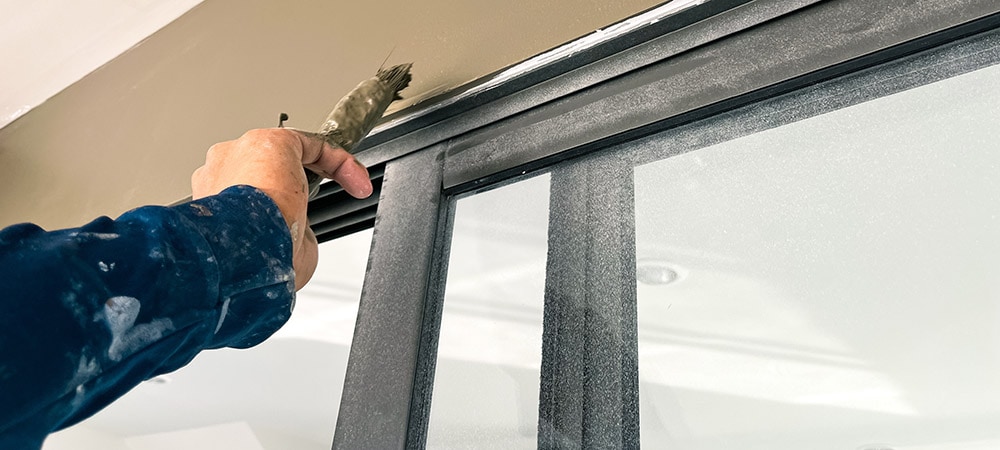
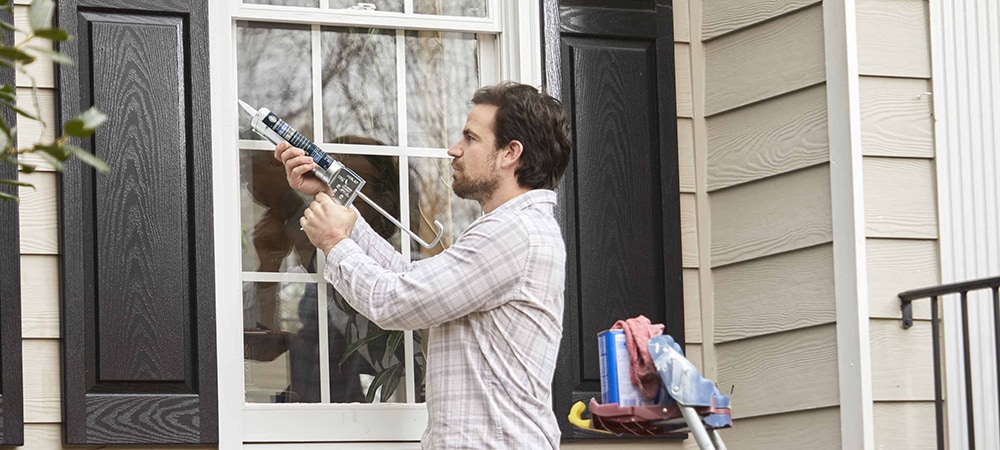
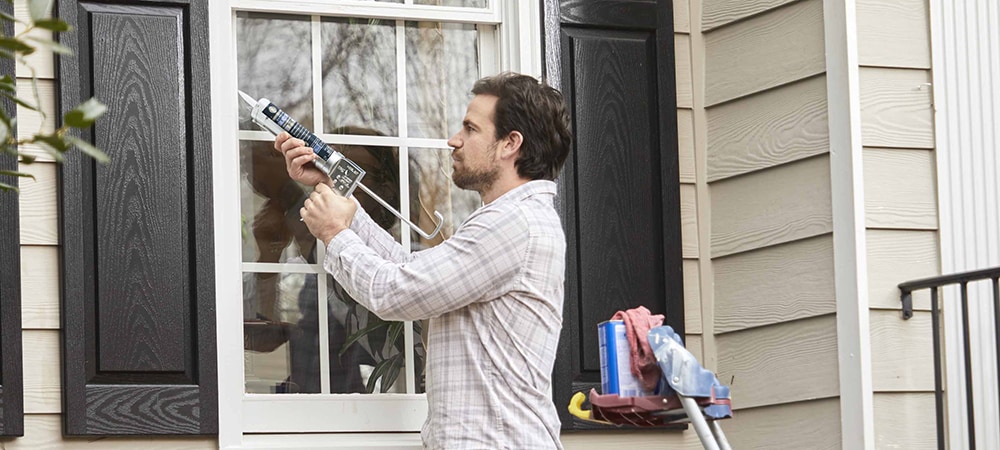
  • Advanced Silicone 2® Window & Door Sealant: This high-performance silicone sealant is designed to create a durable, weather-resistant seal around windows and doors. By reducing drafts, it helps to enhance insulation and maintain stable indoor temperatures, which can contribute to reduced heating and cooling costs. Its flexibility and resistance to extreme weather make it an excellent choice for Canada’s varying climate conditions.
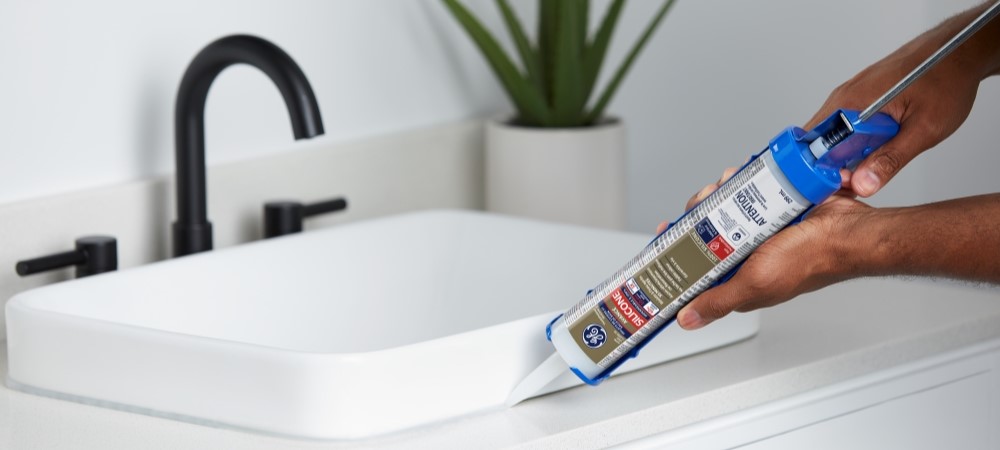
  • Supreme Silicone Window & Door Sealant: Combining the flexibility and durability of silicone with the option to paint over it, this sealant is ideal for areas where aesthetic finishes are important. It’s fully paintable in 30 minutes and effectively seals gaps that could allow energy loss. Additionally, it helps insulate against drafts, improving energy efficiency in areas where appearance matters.

Using GE products can reduce energy loss, improve temperature control, and provide long-lasting weatherproofing for secondary suites. While these products enhance energy efficiency, they are part of a broader renovation strategy. To qualify for the Multigenerational Home Renovation Tax Credit, ensure all renovations meet federal eligibility requirements and consult a tax professional for tailored advice.

To get GE Sealants’ products for your multigenerational renovation project, visit these fine retailers.

Contact Form

Let’s learn whether to caulk before or after painting Caulk and paint: which comes first?

Note: This DIY article is provided as a general guide only and is not intended to take the place of product-specific installation procedures; always follow applicable manufacturers’ instructions. Depending on your home’s age and condition, location within the home, and other potential factors, repairs and/or upgrades or other services may be necessary prior to the beginning and/or completion of your project that may involve the services of a home improvement professional. This article does not include advice pertaining to local building codes and/or any related inspections.

In home improvement projects, knowing whether to caulk before or after painting is an important part of getting a smooth, professional finish. Which to apply first can depend on the type of caulk used, as some materials—like silicone—typically aren’t paintable. This blog will guide you through the differences between acrylic caulk and silicone sealant and help you choose the right approach for your project.

Understanding caulk and paint compatibility

GE Sealants offers two different formulations. Acrylic caulk is water-based and paintable, making it suitable for interior projects where aesthetics matter. It adheres well to various surfaces and can be painted over once it cures.

Silicone sealant, in contrast, is not paintable due to its chemical properties. As silicone sealant offers excellent flexibility and waterproofing, it is ideal for areas exposed to moisture like bathrooms and kitchens. However, paint does not adhere to silicone sealant, so sealant should be applied after painting. Knowing how these materials interact with paint is essential for achieving a professional finish.

Acrylic caulk is paintable and suited for interior projects, while silicone sealant is non-paintable but highly flexible and waterproof, making it ideal for outdoor projects. For a professional finish, apply acrylic caulk before painting and silicone sealant after painting.

Acrylic caulk: paintable and flexible

Acrylic caulk is a versatile, paintable sealing option commonly used for interior applications where aesthetics are a priority. It’s a water-based caulk that adheres well to various materials, including wood, drywall, and masonry, making acrylics like Max® Shield Painter’s Pro suitable for sealing gaps around baseboards, trim, windows, and doors.

One of the main advantages of acrylic caulk is that it dries to a firm, paintable finish, allowing it to blend in on painted surfaces. This quality is particularly useful in projects where the caulked areas need to be concealed or matched with the room’s colour scheme.

To apply acrylic caulk, ensure the surface is clean and dry before application. Use a steady bead along the gap, smoothing it with a caulk tool or damp finger to create a uniform surface. Once it’s fully cured—which usually takes 24 hours depending on humidity—you can paint over it for a smooth, professional finish.

Acrylic caulk is also known for its flexibility, which helps it resist cracking and withstand minor movements in the materials it’s applied to. For these reasons, acrylic caulk is an ideal choice for interior finishing projects where both flexibility and colour scheme are important.

Silicone sealant: non-paintable but durable

Silicone sealants like Supreme Silicone Kitchen & Bath Sealant are popular for their durability, flexibility, and resistance to moisture and are typically the preferred choice for high-moisture areas like bathrooms, kitchens, and exterior applications. Unlike acrylic caulk, silicone has a non-paintable surface—due to its chemical composition, which tends to repel paint and prevent it from adhering effectively. Silicone sealant’s resistance to chemical bonding after curing can be beneficial in situations where longer-lasting protection against water is desired, but it also means silicone sealant should only be applied after any necessary painting is completed.

The application process for silicone sealant is straightforward but requires attention to detail for a clean result. Begin with a clean, dry surface, as this helps the sealant bond securely and prevents potential leaks. Apply a consistent bead of silicone along the joint, then smooth it with a caulk tool or a damp finger to achieve a uniform, sealed finish. Silicone sealant remains flexible even after curing—allowing it to expand and contract with temperature changes or building movement—reducing the risk of cracks. Its resistance to UV rays and extreme temperatures also makes it ideal for outdoor use. While it may not be paintable, silicone sealant offers reliable protection where long-lasting, moisture-resistant sealing is a priority.

Choosing the right caulk or sealant for different areas of the home

Selecting the appropriate caulk for each part of your home matters for both durability and appearance. Acrylic caulk is ideal for interior spaces like living rooms, bedrooms, and hallways, where moisture levels are low, and paintability is a priority. It adheres well to wood, drywall, and masonry, allowing it to blend seamlessly with painted surfaces for a clean, finished look.

Alternatively, silicone sealant excels in high-moisture areas such as:

  • Bathrooms
  • Kitchens
  • Around exterior windows and doors

Silicone sealant’s waterproof and flexible nature withstands humidity and temperature changes, making it perfect for sealing joints in characteristically wet or outdoor environments. By choosing the correct caulk type, you ensure a long-lasting, professional-quality finish for your home improvement projects.

Maintenance tips for caulked joints

To keep caulked joints looking their best, perform regular maintenance. Inspect joints annually, especially in high-moisture areas like bathrooms and kitchens, where caulk may degrade over time. Look for signs of cracking, peeling, or separation from the surface, which can indicate it’s time to reapply.

For silicone-sealed areas, ensure any cleaning agents are non-abrasive to prevent damaging the sealant. In interior spaces with acrylic caulk, a quick touch-up with matching paint can refresh the look if minor wear appears. Following these simple maintenance steps helps extend the life and appearance of caulked surfaces.

Common mistakes to avoid in caulking and painting

Achieving a smooth, professional caulked finish requires careful technique and attention to detail. A common mistake is not allowing sufficient curing time. Acrylic caulk needs a full 24 hours to dry before painting. Applying paint over silicone sealant is another frequent error, as silicone’s non-paintable surface leads to peeling and uneven results.

Using the wrong caulk for specific environments, such as applying acrylic in wet areas, can lead to early degradation. Finally, avoid applying too thick a bead, as excessive caulk can cause unsightly bulges. Following proper guidelines helps avoid these pitfalls and creates a lasting, professional finish.

To get GE Sealants’ products for your home improvement project, visit these fine retailers.

Contact Form

Let’s find the right caulking gun for your next DIY sealing job Selecting and operating a caulking gun that makes your job a breeze

Note: This DIY article is provided as a general guide only and is not intended to take the place of product-specific installation procedures; always follow applicable manufacturers’ instructions. Depending on your home’s age and condition, location within the home, and other potential factors, repairs and/or upgrades or other services may be necessary prior to the beginning and/or completion of your project that may involve the services of a home improvement professional. This article does not include advice pertaining to local building codes and/or any related inspections.

A caulking gun is an essential tool for anyone looking to achieve a professional finish on sealing jobs around the home or workplace. Using a caulking gun allows you to apply sealants with precision, saving time and reducing waste compared to manual methods. Whether you’re tackling windows, doors, or bathroom fixtures, a caulking gun makes it easy to apply an even bead of sealant with high-quality results.

Parts of a caulking gun

A caulking silicone gun consists of several key components that coordinate to provide a smooth and controlled application of sealant. Understanding these parts can help you operate the tool more effectively and achieve professional results. Here are the main components of a caulking gun:

  • Frame: The frame holds the caulk tube securely in place. It comes in various types, including open and closed frames, each offering different levels of visibility and support.
  • Trigger: The trigger is what you squeeze to push the sealant through the nozzle. A good trigger should be easy to press, allowing you to control the flow with minimal effort. Many caulking guns also feature an ergonomic grip for added comfort during extended use.
  • Plunger: The plunger is a metal rod that pushes against the back of the caulk tube as you press the trigger. This component ensures that the sealant is dispensed evenly. Some models include a ratchet mechanism to prevent the plunger from moving backward and to allow for consistent pressure.
  • Nozzle: The nozzle directs the sealant onto the surface. It should be kept clean and free of clogs to ensure a smooth application. Different nozzle sizes and shapes are available, depending on the type of sealant and the job.

Choosing a caulking gun with the right features can significantly enhance your results.

Features to look for when buying a caulking gun

When choosing a caulking gun, certain features like ergonomic design, drip-free technology, and the right thrust ratio can make a big difference in ease of use and effectiveness. Also, consider electric over manual for larger jobs.

When choosing a caulking gun, certain features can make a big difference in ease of use and effectiveness. Here are some key features to consider:

  • Ergonomic design: Look for a caulking gun with a comfortable grip, especially if you’ll be using it for extended periods. An ergonomic design reduces hand strain and makes the gun easier to control.
  • Drip-free technology: Some caulking guns have an automatic drip-stop feature that prevents sealant from leaking when you release the trigger. This can save time on cleanup and ensure a neat application.
  • Thrust ratio: The thrust ratio determines how much force is applied to the tube with each trigger squeeze. A higher thrust ratio — e.g., 10:1 or 12:1 — is ideal for thicker sealants or heavier-duty tasks.
  • Manual vs electric: Manual caulking guns are suitable for smaller jobs, while electric or battery-powered models offer more power and are easier to use for longer periods.

How to use a caulking gun

Even if you’re unfamiliar, you can quickly learn how to operate a caulking gun effectively with some basic guidance. Follow these steps to properly load and use a caulking gun:

  1. Prepare the caulk tube

    Start by cutting the nozzle at a 45-degree angle to create an opening. The size of the opening should match the width of the gap you’re sealing. Next, puncture the seal inside the tube using the tool attached to the caulking gun or a long nail.

  2. Load the tube into the gun

    Pull back the plunger all the way to make space for the tube. Place the tube into the frame, with the nozzle facing forward. Push the plunger forward until it rests against the back of the tube.

  3. Adjust the plunge

    Squeeze the trigger a few times until you feel resistance. This ensures that the plunger is pressing against the tube and that the sealant is ready to be dispensed.

  4. Apply the sealant

    Hold the gun at a 45-degree angle to the surface. Squeeze the trigger gently while moving the gun along the seam you wish to seal. Keep a steady pace to avoid uneven application. If your caulking gun has a drip-stop feature, use it to prevent excess sealant from flowing out when you release the trigger.

  5. Smooth the sealant bead

    Once applied, use a caulk finishing tool or your finger — dipped in water — to smooth the bead for a clean finish. Wipe away any excess sealant with a damp cloth.

By following these steps, you can achieve a professional-grade application with minimal hassle. Practice and familiarity with your caulking gun will further improve your precision.

Benefits of using a caulking gun for various jobs

Using a caulking gun offers several benefits for sealing projects. Here are some of the key advantages:

  • Precision and control: A caulking gun allows for accurate application, helping you apply sealant exactly where it is needed. This precision is especially helpful for detailed jobs like sealing corners and narrow gaps.
  • Time efficiency: Compared to manual application, a caulking gun speeds up the process significantly. It dispenses sealant evenly, which reduces the need for rework and makes large jobs easier to complete.
  • Consistency of application: A caulking gun ensures a smooth, continuous bead of sealant. This consistency improves the seal’s durability and appearance.
  • Versatility for various tasks: Caulking guns are compatible with different types of sealants, making them suitable for a range of tasks, from sealing windows and doors to waterproofing bathrooms.

GE Sealant products to use with your caulking gun

For optimal results in DIY sealing tasks, GE offers a range of silicone sealants suitable for different applications.


  • Additionally, Paintable Silicone All Projects Sealant works well for surfaces requiring a painted finish. Each product is designed for specific uses, ensuring a reliable seal with long-lasting results.

To get GE Sealant products for your home improvement project, visit these fine retailers.

Contact Form

Let’s find the right silicone sealant for your project What every contractor needs to know before choosing silicone sealant

From bathrooms to outdoor spaces, contractors work with silicone sealants in various environments. Choosing the right type of silicone sealant can make a significant difference in durability and effectiveness, depending on the job at hand. This guide will help you understand the different types available and recommend the best options for specific applications.

Types of silicone sealants and their uses

Silicone sealants come in various formulations designed for specific applications, making it important to choose the right type for each project. Below are the primary types of silicone sealants and their key features:

  • General-purpose silicone sealants: General-purpose silicone sealants are versatile and designed for a wide range of tasks. They offer flexibility, durability, and resistance to shrinking and cracking. These sealants work well on most non-porous surfaces, making them suitable for both indoor and outdoor applications where moisture is less of a concern.
  • Kitchen and bath silicone sealants: Kitchen and bathroom silicone sealants are specially formulated with antimicrobials like methylparaben and zinc pyrithione to resist mould and mildew. They provide a flexible, watertight seal, making them ideal for areas exposed to moisture, such as around sinks, bathtubs, and showers.
  • Outdoor/weatherproof silicone sealants: Outdoor silicone sealants are engineered with UV stabilizers and flexible polymers to withstand harsh weather conditions, including extreme temperatures and UV exposure. These sealants are typically used for sealing windows, doors, and other exterior surfaces that may experience frequent temperature fluctuations. Weatherproof sealants also adhere well to a variety of surfaces such as metal and glass.

Choosing the right type of silicone sealant depends on the specific needs of your project. By understanding the benefits and ideal uses for each type, you can ensure quality, long-lasting results.

Selecting the right silicone sealant for your project

When choosing a silicone sealant, consider the specific requirements of your project such as environmental exposure, surface compatibility, and the required flexibility of the seal.

When choosing a silicone sealant, consider the specific requirements of your project. Here are some key factors to keep in mind:

  • Environmental exposure: Determine whether the sealant will be exposed to moisture, sunlight, or extreme temperatures. For example, bathrooms and kitchens require mould-resistant formulations, while outdoor projects need UV-resistant and seal flexibility to handle varying weather conditions.
  • Surface compatibility: Different sealants adhere better to certain surfaces. Ensure that the sealant you choose is compatible with the materials you’ll be working with, such as glass, metal, or tile. Some sealants are labeled as multi-surface, but double-checking compatibility can prevent future issues.
  • Flexibility and movement: For areas that experience movement or vibration, like windows or exterior joints, select a sealant that maintains flexibility over time. Weatherproof or general-purpose sealants are often better suited for these applications due to their elasticity.
  • Curing time: Silicone sealants typically have a drying time — becoming dry to the touch after 30-60 minutes — and a curing time — stabilizing internally after 24-48 hours. Consider how quickly the sealant cures, especially for projects where you need to minimize downtime. Faster curing times are beneficial for areas with frequent use, such as bathrooms or kitchen counters.

Recommended GE Sealants products for different kinds of projects

GE Sealants offers a wide variety of high-quality silicone sealants for different applications.

Bathrooms

Supreme Silicone Kitchen & Bath Sealant excels in sealing bathroom features and sinks, with lifetime mould protection and strong flexibility. This sealant can handle continuous moisture, making it ideal for areas like showers, bathtubs, and faucet heads. It forms a durable, watertight seal resistant to shrinking and cracking.

Kitchens

GE Sealants recommends Advanced Silicone 2® Kitchen & Bath Sealant for sealing kitchen areas. It cures quickly, becoming water-ready in just 30 minutes. This sealant is designed to resist mould and mildew, maintaining its appearance and functionality over time, even in high-use areas around sinks and countertops.

Outdoor projects

Supreme Silicone Window & Door Sealant offers excellent weatherproofing and UV resistance, making it perfect for sealing windows, doors, and other exterior elements. This product’s flexibility allows it to expand and contract with temperature changes, reducing the risk of cracking or shrinking. Its strong adhesion to a variety of materials ensures a secure and lasting seal in highly variable temperatures.

Ready to tackle your next project? Choose GE Sealants silicone sealants for durable, moisture-resistant seals in any environment. Whether it’s the bathroom, kitchen, or outdoor spaces, find the perfect GE Sealants product to get lasting results for your home improvement project, by visiting these fine retailers.

Contact Form

Let’s find the right caulk or sealant for your project. Your complete guide to caulk vs sealant

Note: This DIY article is provided as a general guide only and is not intended to take the place of product-specific installation procedures; always follow applicable manufacturers’ instructions. Depending on your home’s age and condition, location within the home, and other potential factors, repairs and/or upgrades or other services may be necessary prior to the beginning and/or completion of your project that may involve the services of a home improvement professional. This article does not include advice pertaining to local building codes and/or any related inspections.

Caulk and sealant are essential products for sealing gaps and joints in various home improvement projects, but they are not exactly interchangeable. Understanding the differences between the two will help you choose the right material for the job. This guide explains what caulk and sealant are, when to use adhesive caulk vs silicone sealant, and other various key distinctions between them.

What is caulk?

Caulk is a flexible, gunnable material — gunnable in this context means capable of being loaded into a gun-type dispenser — primarily used to seal gaps and joints in interior applications. With a movement capability — a measure of a substance’s malleability — of less than 12.5%, caulk is ideal for areas with minimal expansion or contraction. It’s commonly applied to close small gaps and prevent air leakage around:

  • Windows
  • Doors
  • Baseboards
  • Crown moulding

While caulk provides a neat finish, it doesn’t have the same level of flexibility or durability as sealant, making it better suited for areas without significant movement or extreme weather conditions.

There are several types of caulks available, each designed for specific uses.

  • Acrylic and latex caulks are popular for interior work because they are paintable and easy to clean up with water.
  • Adhesive caulk, a more specialized option, provides additional bonding strength and is often used where structural integrity is needed.

While caulk can offer some moisture resistance, it is not suitable for waterproofing or high-moisture areas, such as bathrooms or kitchens. Choosing the right caulk for your project ensures a long-lasting, professional finish that complements the interior space.

Unlike caulk, sealant is highly malleable, with a movement capability greater than 12.5%. This allows sealant to stretch and contract significantly without cracking or losing adhesion. As such, sealant is ideal for exterior applications, such as sealing around windows, doors, and siding, as well as waterproofing high-moisture areas like bathrooms and kitchens.

What is sealant?

Sealant is a flexible, durable material designed to seal gaps and joints in areas exposed to significant movement or harsh environmental conditions. Unlike caulk, sealant is highly malleable, with a movement capability greater than 12.5%. This allows sealant to stretch and contract significantly without cracking or losing adhesion. As such, sealant is ideal for exterior applications, such as sealing around windows, doors, and siding, as well as waterproofing high-moisture areas like bathrooms and kitchens.

There are two different types of sealants, silicone and polyurethane.

  • Silicone sealants are particularly known for their excellent water resistance, making them perfect for use in bathrooms, kitchens, and around plumbing fixtures.
  • Polyurethane sealants, on the other hand, are more commonly used in outdoor projects where weather resistance and durability are essential.

Sealants generally adhere well to a variety of materials, including glass, metal, and tile, with long-lasting protection against moisture, air, and weather infiltration.

While sealants are typically more expensive than caulks, they provide superior flexibility and durability, making them the better choice for projects requiring long-term performance in challenging environments. Selecting the right sealant ensures a proper seal that remains intact, even under extreme weather stress.

Key differences: caulk vs sealant

The primary distinction between caulk and sealant is their movement capability. As noted, caulk has a movement capability of less than 12.5%, meaning it works best in areas with little expansion or contraction, such as interior trim or around windows. By definition, a sealant has a movement capability greater than 12.5%, with some special-use silicone sealants — such as those used in buildings with seismic resistance — exhibiting up to 50% movement capability. This enhanced flexibility allows the sealant to flex and move without cracking.

In terms of durability, sealant outperforms caulk in areas that experience fluctuating temperatures, moisture, or constant exposure to the elements. For example, silicone sealants are waterproof and can resist UV light, making sealants like Supreme Silicone Kitchen & Bath Sealant ideal for bathrooms and other areas exposed to water, whereas caulk is more suitable for dry spaces. Sealants also tend to have a longer lifespan and better resistance to wear over time.

Another key difference is in their adhesive properties. Sealants — especially silicone varieties — provide excellent adhesion to a range of surfaces, including metal, glass, and tile. Caulk, while effective in creating a seal, doesn’t offer the same level of adhesion or flexibility.

Caulk vs sealant for specific projects

Choosing between sealing vs caulking largely depends on the specific requirements of your project. For interior projects with minimal movement — such as sealing gaps in trim, baseboards, or drywall — caulk is typically the better option. Acrylic or latex caulks are ideal for these applications because they provide a smooth finish and can be painted to match the surrounding surfaces. Caulks are also easier to clean up and apply in areas where moisture exposure is minimal.

For exterior projects or areas exposed to the elements, sealant is the superior choice. Silicone sealants are designed to handle temperature fluctuations, UV exposure, and weather conditions without losing flexibility or adhesion. When sealing around the exterior of windows and doors, for instance, silicone sealant offers long-lasting protection against water infiltration and prevents drafts.

In the case of bathroom sealant vs caulk — where high moisture levels are expected — using a silicone sealant like Advanced Silicone 2® Kitchen & Bath Sealant is necessary for creating a waterproof barrier around sinks, bathtubs, and showers. Silicone sealants are mould- and mildew-resistant, making them more durable in wet environments. On the other hand, adhesive caulk might be used for projects that require some bonding strength, such as securing light fixtures or trim, but it’s not suitable for areas that need to flex and remain watertight. Ultimately, selecting the right product depends on whether your project requires flexibility, waterproofing, or durability in extreme conditions.

For all your sealing needs, trust GE Sealants Canada for high-quality products designed to meet the demands of both residential and commercial projects. Whether you need caulk for interior applications or sealant for exterior protection, our range of silicone and acrylic solutions ensures long-lasting performance. Explore our product line to find the right sealant for your next project and achieve reliable, professional results.

To get GE Sealants’ products for your home improvement project, visit these fine retailers.

Contact Form

Let’s learn how to seal windows and doors. How to seal windows and doors

Note: This DIY article is provided as a general guide only and is not intended to take the place of product-specific installation procedures; always follow applicable manufacturers’ instructions. Depending on your home’s age and condition, location within the home, and other potential factors, repairs and/or upgrades or other services may be necessary prior to the beginning and/or completion of your project that may involve the services of a home improvement professional. This article does not include advice pertaining to local building codes and/or any related inspections.

Sealing windows and doors effectively is an essential DIY skill for homeowners. Properly sealed windows and doors prevent drafts, reduce energy costs, and help you maintain a comfortable indoor environment. On the other hand, poor sealing causes air leakage, water infiltration, and — in extreme cases — long-term structural damage to your home.

9 steps for sealing windows and doors in your home

In this guide, we’ll walk you through the process of sealing windows and doors to ensure they are fully protected against air and moisture. Whether you’re preparing your home for winter or simply looking to improve your home’s energy performance, following these steps will help you achieve professional results.

  1. Inspect the area

    Before applying any sealant or foam, thoroughly inspect the windows and doors you plan to seal. Look for existing gaps, cracks, or damage around the frames, as these areas may need repair before sealing. Make sure the surfaces are clean, dry, and free of dust or old caulking. Caulk residue and dust can prevent new materials from adhering properly. Pay close attention to corners and joints, where air and water leakage are more common. By starting with a clean and prepared surface, you’ll achieve a longer-lasting, more effective seal.

  2. Choose the right materials

    When sealing windows and doors, the quality of the outcome largely depends on the quality of the materials you choose. You can use either silicone or polyurethane sealant. However, silicone sealant is generally preferable to polyurethane for this task due to its superior flexibility and weather resistance.

    A photo of Supreme Silicone Window & Door Sealant

    Silicone sealants like Supreme Silicone Window & Door Sealant hold an effective seal in extreme temperatures. For the same degree of protection but in a variety of color options, choose Advanced Silicone 2® Window & Door Sealant. Silicone also resists UV degradation, which is important for exterior applications. Polyurethane, while strong, can break down more quickly when exposed to sunlight and fluctuating temperatures.

  3. Apply painter’s tape

    Place painter’s tape at the edges around the window or door frames to protect adjacent surfaces and help you maintain straight lines. Then measure the gaps around the windows and doors to determine how much sealant or foam you’ll need. Taking the time to prep the area properly helps prevent over-application and ensures an even, effective seal around the frame.

  4. Apply insulating foam around windows and doors

    Expanding foam insulation is ideal for filling large gaps around windows and doors, as it provides both insulation and an airtight seal. Choose a foam specifically designed for windows and doors. Standard foams expand more and may warp your window and door frames. Hold the can upright and apply the foam in layers, filling gaps to about 50% to allow room for expansion. Be patient and resist the urge to fill the gap entirely, as an excess of even the right foam can create pressure that deforms window and door frames.

    Apply the foam at a depth that fills the gap upon expansion but doesn’t spill out from the frame. If foam overflows, wait for it to dry and then trim the excess with a utility knife. Always wear gloves and protective eyewear while applying foam to avoid irritation.

  5. Apply sealant

    After applying insulating foam, it’s time to seal the edges with sealant or foam. While foam fills larger gaps and provides insulation, silicone sealant creates a waterproof barrier around window and door frames.

    Start by cutting the tip of the sealant tube at a 45-degree angle for better control. Apply a continuous bead of sealant around the perimeter where the frame meets the wall or siding. Use steady, even pressure on the caulking gun, and smooth the bead with a gloved finger or caulk-smoothing tool for a clean finish. Make sure not to seal over areas that allow for movement or drainage.

    Don’t block window weep holes during the sealing process. Weep holes prevent water buildup that causes rot or mould. Leave weep holes clear to maintain proper drainage and protect the window from water damage.

  6. Seal

    Weep holes are small openings at the bottom of window frames designed to allow water to escape. It’s important not to block these during the sealing process, as they play an essential role in preventing water buildup that causes rot or mould. While sealing the rest of the window frame is important, leaving weep holes clear helps maintain proper drainage and protects the window from water damage.

    When applying sealant or foam around windows, avoid covering the weep holes. If you accidentally seal the holes, use a small tool like a screwdriver to clear the blockage after the sealant has set. For extra caution, consider using tape to mark off the weep holes before you begin sealing. Keeping these drainage pathways open allows rainwater or condensation to escape.

  7. Test the sealed areas for leaks and drainage

    Once you’ve sealed the windows and doors, check that the weep holes are functioning correctly. Pour a small amount of water along the bottom edge of the window frame and watch to see if it drains through the weep holes. If water pools or doesn’t drain, check to see if sealant or debris is blocking the openings. This simple test will save you headaches and repair costs later on.

  8. Allow the sealant to cure

    After applying sealant, allow adequate curing time before exposing it to moisture or extreme temperatures. Depending on the type of sealant used, curing may take anywhere from 24 to 48 hours. In any case, follow the manufacturer’s guidelines to ensure the sealant is set properly.

  9. Check sealant for gaps

    After the sealant cures, inspect all sealed areas for gaps or weak spots. Pay special attention to areas prone to moisture. Re-inspect after a rainstorm or seasonal change to check that the seals remain intact. Regular inspections help maintain long-term effectiveness and protect against potential water damage.

To get GE Sealants’ products for your home improvement project, visit these fine retailers.

Contact Form

Let’s learn how to caulk like a pro. Caulking 101: How to caulk like a pro

Note: This DIY article is provided as a general guide only and is not intended to take the place of product-specific installation procedures; always follow applicable manufacturers’ instructions. Depending on your home’s age and condition, location within the home, and other potential factors, repairs and/or upgrades or other services may be necessary prior to the beginning and/or completion of your project that may involve the services of a home improvement professional. This article does not include advice pertaining to local building codes and/or any related inspections.

If you own and maintain a home, chances are you’ll need to learn how to caulk — along with when and where — at some point. Proper caulking can prevent leaks, improve energy efficiency, and give fixtures and surfaces in your home a neat, professional appearance. By sealing gaps and cracks, caulk helps to maintain a comfortable indoor environment and protect your property from water damage and drafts.

Materials and tools needed to caulk like a pro

This is a comprehensive guide to caulking that includes a list of tools and materials, preparation steps, and caulking tips and tricks for achieving a professional finish. Whether you’re sealing windows, doors, or baseboards, understanding how to apply caulk correctly will help you get the job right the first time. Additionally, this guide explains the differences between acrylic caulk and silicone sealant to help you choose the right product for various tasks around your home. With the right knowledge and skills, you can tackle caulking projects with confidence and achieve professional-grade results.

Before you begin any sealing project, gather the right materials and tools. The key items you’ll need are:

  • Caulk: Choose the appropriate type for your project. Silicone sealant is ideal for non-porous surfaces like glass and metal, while acrylic caulk works well on wood and drywall.
  • Caulk gun: A quality caulk gun helps deliver a consistent and controlled application. Look for one with smooth trigger action.
  • Painter’s tape: Use painter’s tape to create clean, straight lines and prevent caulk from spreading onto unwanted areas.
  • Utility knife: A sharp utility knife is necessary for cutting the caulk tube nozzle and removing old caulk.
  • Caulking tool or spoon: These tools help to smooth applied caulk for a professional finish.
  • Cleaning supplies: Have rags, a vacuum, or a brush on hand to clean the surface before applying new caulk.

Where to use acrylic caulk vs. where to use silicone sealant

Acrylic caulk is ideal for areas that require a rigid, paintable seal — areas like windows, doors, and baseboards. It effectively fills gaps and cracks and prevents drafts and moisture from entering your home. On the other hand, silicone sealant is more suitable for areas exposed to significant moisture and movement, such as bathrooms, kitchens, and exterior surfaces.

Acrylic caulk and silicone sealant serve similar purposes and may seem more or less interchangeable to first-time users. However, there are some important differences you need to know. Caulk is ideal for areas that require a rigid, paintable seal — areas like windows, doors, and baseboards. It effectively fills gaps and cracks and prevents drafts and moisture from entering your home.

On the other hand, sealant is more suitable for areas exposed to significant moisture and movement, such as bathrooms, kitchens, and exterior surfaces. Silicone sealant provides a flexible, waterproof seal that expands and contracts with the movement of sealed joints in these areas.

Knowing the difference between caulk and sealant will help you choose the right product for each task. By applying both caulk and sealant in their respective appropriate places, you can maintain your home for years to come.

How to seal: Preparation

Successful sealing starts with proper preparation. Start by thoroughly cleaning the surfaces where you will apply caulk. Use a vacuum or brush to remove any dust or dirt. For stubborn grime, a mild detergent solution can help. Once clean, make sure the area is completely dry, otherwise caulk may not adhere properly.

Next, remove any old caulk from the seams. A utility knife or a specialized caulk removal tool works great for this task. Carefully cut along the edges of the old caulk and peel it away by hand, taking care not to damage the surrounding surfaces.

Once the old caulk is removed, wipe down the area with a damp cloth to remove any remaining residue. Allow it to dry completely. Finally, apply your painter’s tape along the edges of the seam to create clean lines.

Loading and using the caulking gun

First, cut the nozzle of the caulk tube — we recommend Max® Shield Painter’s Pro for areas you intend to paint — at a 45-degree angle and try to match the opening to the size of the gap you need to fill.  Smaller openings usually allow for more precise control.

Pierce the inner seal foil first. Then insert the caulk tube into the caulking gun, making sure it is securely in place. Press the release trigger to engage the plunger and the tube. Before you start on your intended surfaces, practice squeezing the trigger a few times to get a feel for the pressure needed to maintain a steady flow.

When you’re ready to apply caulk, hold the gun at a consistent 45-degree angle to the seam. Apply steady pressure on the trigger and run the gun smoothly along the joint. As much as possible, maintain consistent speed and pressure for more consistent results. After applying the caulk, use a caulking tool or your finger to smooth the bead.

Caulking tips and tricks

To achieve a professional finish when caulking, learn these best practices and common mistakes:

Best practices:

  • Cut the nozzle correctly: Cut the nozzle at a 45-degree angle to control the flow and match the gap size.
  • Test before applying: Practice on a piece of cardboard to get a feel for the caulking gun’s pressure and flow.
  • Work in small sections: Apply caulk in manageable sections to maintain control and precision.
  • Smooth immediately: Smooth the caulk immediately after application using a caulking tool or a wet glove finger.

Common mistakes to avoid:

  • Skipping surface preparation: Always clean and dry the surface thoroughly before applying caulk.
  • Applying too much caulk: Avoid overfilling gaps, as excess caulk can be difficult to smooth.
  • Not smoothing caulk: Failing to smooth the bead leaves uneven and weak seals.
  • Ignoring curing time: Allow the caulk to cure fully as per the manufacturer’s instructions before exposing it to moisture or paint.

To get GE products for your home improvement project, visit these fine retailers.

Contact Form

Let’s find the best waterproof sealant for metal for your project. Choosing the best waterproof sealant for metal

Note: This DIY article is provided as a general guide only and is not intended to take the place of product-specific installation procedures; always follow applicable manufacturers’ instructions. Depending on your home’s age and condition, location within the home, and other potential factors, repairs and/or upgrades or other services may be necessary prior to the beginning and/or completion of your project that may involve the services of a home improvement professional. This article does not include advice pertaining to local building codes and/or any related inspections.

In a wide variety of industrial and residential applications, protecting metal surfaces from water damage and other moisture effects is an essential part of maintaining structural integrity and longevity. Waterproof sealants for metal surfaces play a vital role in preventing rust, corrosion, and other forms of water damage.

Types of waterproof sealants for metal

From automotive to construction and home maintenance, the right sealant can significantly extend the life of metal structures and equipment. However, selecting the best waterproof sealant for metal can be challenging due to the variety of options available. Understanding the differences between these sealants is a necessary first step for making informed decisions that meet your specific requirements. This guide explores different types of waterproof sealants suitable for metal and highlights their pros and cons to help you make the best choice for your projects.

For flexibility and durability, metallic silicone sealants are unrivaled in sealing metal surfaces. They offer exceptional resistance to weathering, UV light, and temperature extremes. Silicone sealants adhere well to metals and form strong, waterproof bonds that prevent moisture penetration and corrosion.

You can seal gaps, spacings, and various fittings made of metal with different base-material sealants. The best choice for any project will depend on climate, temperature extremes, intended use, and budget. Here are the most common types of waterproof sealants for metal.

  1. Polyurethane sealants

    With high ratings for adhesion and versatility, polyurethane sealants are a popular option for waterproofing metal surfaces. Polyurethane sealants provide excellent resistance to abrasion, chemicals, and physical impacts, making them suitable for many demanding environments.

    Pros:

    • Strong adhesion: Polyurethane sealants bond well with various surfaces, including metals.
    • High resistance to abrasion and chemicals: These sealants can withstand harsh conditions, such as exposure to solvents and physical wear. For this reason, polyurethane is a common choice for industrial and automotive applications.
    • Fast curing time: Polyurethane sealants typically cure quickly, minimizing downtime for project completion.

    Cons:

    • Low UV resistance: While polyurethane sealants are durable, they are more susceptible to UV degradation compared to materials like silicone. This reduces their longevity when exposed to direct sunlight.
    • Potential for shrinkage: Over time, polyurethane sealants tend to shrink and compromise formerly tight seals.
  2. Acrylic sealants

    Acrylic sealants can be a practical choice for indoor metal surface applications. They are easy to apply, clean up with water, and are generally more cost-effective than polyurethane sealants.

    Pros:

    • Ease of application: Acrylic sealants are simple to apply and can be cleaned up with water.
    • Paintable: You can paint over acrylic sealants, providing a seamless look for the whole installation.
    • Cost-effective: Typically more affordable than polyurethane options, acrylic sealants are a good budget-friendly choice.

    Cons:

    • Lower durability: Acrylic sealants are not as durable as silicone or polyurethane and are less suitable for heavy-duty or outdoor applications.
    • Poor UV resistance: They do not withstand prolonged exposure to sunlight well.
  3. Butyl rubber sealants

    Butyl rubber sealants exhibit high adhesion to metal surfaces and remain flexible over time. These sealants are ideal for applications requiring strong, long-lasting seals capable of withstanding weathering and chemical exposure. Butyl rubber sealants are typically used in roofing, automotive, and industrial settings.

    Pros:

    • Excellent adhesion: Butyl rubber sealants form strong bonds with metal surfaces and resist corrosion.
    • Good resistance to weathering and chemicals: Butyl sealants can withstand harsh environmental conditions and exposure to chemicals — hydrocarbons, acids, and alkalis.
    • Maintains flexibility: Unlike some sealants that can become brittle over time, butyl rubber remains flexible and can accommodate movement and temperature changes without cracking.

    Cons:

    • Messy application: Butyl rubber sealants have a thick, sticky consistency and the material tends to string and adhere to both tools and surfaces. This makes it more challenging to achieve a neat, professional-looking appearance.
    • Limited colour options: Butyl sealants come in limited colour options and may be unsuitable for residential applications.
  4. Silicone sealants

    For flexibility and durability, metallic silicone sealants are unrivaled in sealing metal surfaces. They offer exceptional resistance to weathering, UV light, and extreme temperatures. Silicone sealants adhere well to metals and form strong, waterproof bonds that prevent moisture penetration and corrosion.

    Pros:

    • Unmatched flexibility and durability: Metallic silicone sealants maintain their elasticity and integrity over time — even under harsh conditions — making them ideal for metal surfaces that may expand and contract during changes in temperature and humidity.
    • Excellent weather and UV resistance: Metal silicone sealants can withstand prolonged exposure to sunlight and adverse weather conditions without degrading.
    • Excellent adhesion: They form strong bonds with metal surfaces and provide a reliable barrier against water infiltration.

    Cons:

Choosing the best silicone sealant for metal

When selecting a silicone sealant for metal surfaces, homeowners aiming for professional-grade results will likely find silicone sealants like our Metal Silicone 2® Sealant to be the most appealing option. Their high flexibility and durability ensure that metal joints and seams remain intact and watertight — even under highly variable temperatures and environmental conditions. Silicone sealants’ superior resistance to UV light and weathering means they won’t degrade or discolour over time.

For DIY enthusiasts, the excellent adhesion properties of silicone sealants provide a strong, reliable bond that ensures a lasting seal and reduces the need for frequent maintenance. Additionally, silicone sealants are easy to apply with a caulking gun and their smooth finish helps achieve a neat, professional look.

To get GE products for your home improvement project, visit these fine retailers.

Contact Form

Let’s find the best gutter sealant for your home. The best gutter sealant for installing and fixing your gutters

Note: This DIY article is provided as a general guide only and is not intended to take the place of product-specific installation procedures; always follow applicable manufacturers’ instructions. Depending on your home’s age and condition, location within the home, and other potential factors, repairs and/or upgrades or other services may be necessary prior to the beginning and/or completion of your project that may involve the services of a home improvement professional. This article does not include advice pertaining to local building codes and/or any related inspections.

A reliable sealant prevents leaks, withstands various weather conditions, and keeps your gutters from sagging or coming loose. This guide will help you navigate the options and find the best solution for your gutter projects. Equipped with the necessary details, you’ll be able to make an informed decision and protect your home from water damage.

Understanding gutter sealants

Whether you’re installing new gutters or repairing existing ones, selecting the best gutter sealant or the best gutter joint sealer for the job is an essential part of keeping your home protected against the elements. Choosing the right gutter sealant is crucial for ensuring the longevity and effectiveness of your home’s gutter system.

Gutter sealants are made of various materials. On the shelf at a local hardware chain, you can find an assortment of silicone, polyurethane, and butyl rubber sealants. Silicone sealants are highly flexible, waterproof, and weather-resistant, making them ideal for a wide range of materials and climates.

Alternatively, polyurethane sealants offer stronger adhesion and durability, suitable for heavy-duty applications. Butyl rubber sealants — also known for their excellent adhesion and flexibility — are often used in extreme temperature conditions. However, for nearly all DIY applications in homes, silicone sealants beat the rest for both cost and performance. As such, this guide focuses exclusively on silicone sealants for residential use.

The best gutter sealant for your home varies according to a few factors such as local climate, materials in use, and — in the case of repairs — the existing state of disrepair in the gutter system.

Top 3 silicone gutter sealants for leaks, seams, and joints

The best gutter sealant for your home varies according to a few factors such as local climate, materials in use, and — in the case of repairs — the existing state of disrepair in the gutter system. Consider the following to make the best choice for your project.

  1. GE Gutter Silicone 2® Sealant

    GE Sealants’ Gutter Silicone 2® Sealant is a high-performance, 100% silicone sealant specifically formulated for gutter applications. This product is designed to provide a durable, waterproof seal that remains flexible and resilient in highly variable weather conditions. Its advanced formula ensures strong adhesion to both wet and dry surfaces and is suitable for both emergency repairs and long-term installations.

    Best Use-Cases:

    • Metal and Vinyl Gutters: GE Gutter Silicone 2® Sealant offers excellent adhesion to metal and vinyl surfaces, forming a strong, watertight seal. As such, it is an ideal choice for sealing joints, seams, and leaks in gutters made from these materials.
    • Quick Repairs: The sealant’s 30-minute rain-ready formula allows for rapid application and protection against leaks, which is particularly beneficial in regions with frequent rain or unpredictable weather.
    • Harsh Weather Conditions: With UV resistance and the ability to withstand extreme temperatures, GE Gutter Silicone 2® Sealant is perfect for use in diverse climates. It resists shrinking and cracking, even in harsh environmental conditions.

    Application Tips: To achieve the best results, ensure that the area to be sealed is clean and free from dirt, grease, and old sealant. Use a caulk gun to apply the sealant evenly, and smooth it with a gloved finger or a caulking knife to ensure a consistent seal. Allow the sealant to cure for at least 30 minutes before exposing it to water.

  2. GE Metal Silicone 2® Sealant

    GE Metal Silicone 2® Sealant is a specialized 100% silicone sealant designed for metal applications. It excels in providing a durable, waterproof seal to withstand harsh weather conditions and extreme temperatures. Its advanced formulation ensures excellent adhesion to various metal surfaces, making it an ideal choice for maintaining and repairing metal gutters.

    Best Use-Cases:

    • Metal Gutters and Flashing: With a chemical composition specifically designed for metal applications, GE Metal Silicone 2® Sealant creates a strong, flexible seal that adheres well to aluminum, copper, stainless steel, and other metals. It’s unrivaled as a gutter leak sealant for metal gutters.
    • Long-Term Projects: The GE Metal Silicone 2® Sealant remains permanently flexible, preventing shrinkage and cracking over time. This makes it suitable for projects requiring long-lasting durability.
    • Outdoor Applications: Ideal for exterior use, GE Metal Silicone 2® Sealant provides lasting protection against UV rays, moisture, and temperature fluctuations.

    Application Tips: For optimal results, ensure that the surface is clean and free from contaminants. Use a caulk gun to apply the sealant evenly along the joints and seams. Plan for adequate drying time — at least 30 minutes — before exposing it to water.

  3. GE Advanced Silicone 2® Window & Door Sealant

    GE Advanced Silicone 2® Window & Door Sealant is a high-performance, 100% silicone sealant designed for windows and doors but also highly effective for gutter applications due to its superior adhesion and flexibility. It provides a durable, weatherproof seal that remains flexible in various conditions.

    Best Use-Cases:

    • Multiple Surfaces: This sealant is highly versatile and adheres well to metals, vinyl, and most other common gutter materials. It is effective for sealing joints, seams, and leaks in a wide variety of gutter systems.
    • Extreme Weather: Designed to withstand temperature fluctuations and UV exposure, GE Advanced Silicone 2® Window & Door Sealant is perfect for use in areas with harsh weather conditions.
    • High-Durability Needs: For projects requiring long-lasting performance in humid climates, this sealant provides excellent resistance to mould and mildew. It maintains integrity over time and reduces the need for frequent reapplications.

    Application Tips: Before applying the sealant, ensure the gutter surfaces are dry and free from debris. Unlike other sealants, GE Advanced Silicone 2® Window & Door Sealant is effective even on slightly damp surfaces, making it versatile for various conditions. For best results, apply a steady bead of sealant using a caulk gun, ensuring continuous coverage along seams and joints. In cooler or less humid environments, sealant may require more time to achieve its full strength.

To get GE sealant products for your home improvement project, visit these fine retailers.

Contact Form

Level up your bathroom sealing technique. 7 bathroom sealant tips every contractor needs to know

Note: This article is provided as a general guide only and is not intended to take the place of product-specific installation procedures; always follow applicable manufacturers’ instructions. Depending on your home’s age and condition, location within the home, and other potential factors, repairs and/or upgrades or other services may be necessary prior to the beginning and/or completion of your project that may involve the services of a home improvement professional. This article does not include advice pertaining to local building codes and/or any related inspections.

Whether you have been working with sealant for one year or ten years, you can always learn more. We have collected some tips from professionals for kicking your bathroom sealing job up a notch. With these tips in your back pocket, you’ll stand out as a professional, attracting new and retaining loyal clients.

Dive into seven bathroom sealant tips that help distinguish you as a reliable contractor.

Tip 1. Sealant quality matters

Bathroom sealant must be 100% silicone. You will use sealant rather than caulk for most bathroom jobs since caulk is acrylic and is not as compatible with bathroom sealing jobs. Bathroom silicone is the only material waterproof enough to handle moisture exposure in a bathroom. It is also the best material to withstand the wear and tear of regular bathroom usage.

There are several other sealant features to consider when researching the best bathroom sealant in addition to its waterproof ability. Finding a bathroom silicone sealant with these features will vastly improve your work:

  • Mould protection: Mould is your #1 enemy. Fight against mould by choosing a sealant that protects against its growth. For example, many of GE Sealant’s bathroom sealants have a 10-year mould-free protection.
  • Flexibility: Silicone’s flexibility is why contractors use it for sealing bathrooms. Flexible silicone moves without cracking or breaking. It can also withstand temperature changes without losing its seal. A sealant like GE sealant’s 40% more flexible sealant gives your work added strength.
  • Water readiness: Bathrooms have nearly constant moisture exposure. When you select a sealant for the room, look at its water-ready time. This is the  minimum time required before it is water resistant, and it can be exposed to water without losing its seal while curing.
  • Pairing with finishes: How well does your sealant pair with your bathroom appliances? A quality bathroom silicone sealant won’t varnish or hurt any finishes.

Many of GE’s bathroom sealants have a 10-year mould-free protection.

Tip 2. Keep the right temperature

The temperature will impact how well your sealant cures. You will want to monitor the temperature of the room, silicone, and the surface.

For the best results, keep your surface and silicone above 0 degrees Celsius and below 48 degrees. The ideal temperature for your area and sealant is 23 degrees Celsius.

You don’t need to hit the ideal temperature to use sealant. As long as the temperature is above freezing, you can begin work. However, if the temperature is cooler, the cure time will increase. So, try to come as close as possible to that 23-degree mark.

Tip 3: Use backer rods for significant gaps

Some gaps and cracks in your bathroom can feel like endless pits. If you try to fill the entire large gap with sealant, you will waste a considerable amount of product where you don’t need it. You only need sealant near the entrance of the gap to keep water out. You can use other materials to fill the gap within the hole.

Backer rods are the most popular choice. They fill in significant gaps and provide a stable surface for the silicone to adhere to.

Use a backer rod for a stronger hold if a gap is deeper than a half inch. Then, conserve your sealant to fill the remaining space, ensuring a smooth, completely sealed finish.

Tip 4: Avoid overworking sealant

Applying silicone is delicate work. You will apply a steady bead and gently press it with your gloved hand or caulking tool to help it seal. Once you have that seal, take a step back while it cures.

If you notice a mistake or bumpy area, your first instinct might be to keep fiddling with the silicone bead until it is perfect.

Overworking silicone, once smooth, can hurt your seal. As you touch it, you risk pulling it away from the surfaces on which it has already begun to cure. Remember, sealant can be water-ready in as little as 30 minutes, so it begins curing fast. You must allow it to dry before touching it or fixing mistakes.

Tip 5: Test sealant before committing

Investing in the best bathroom sealant can ensure you receive a consistent, quality seal. However, even if the product is consistent, it doesn’t mean the area will be equally consistent and reliable. Bathrooms have rough surfaces, smooth surfaces, tiles, and every material in between.

Each person’s bathroom is unique and can also provide unique challenges.

Uneven surfaces and certain appliance finishes are just two ways a bathroom might prevent a sealant from adequately working.

Before committing to sealing an entire bathroom, begin with a small portion to ensure the sealant will work on the surface.

Applying sealant in a bathroom.

Tip 6: Match the sealant’s color

Silicone sealant is not paintable, unless it is specified on the sealant’s bottle.

Just because you can’t paint over the sealant doesn’t mean you don’t have other options. GE sealant offers several different colors of bathroom sealant, including white, clear, and almond.

Choose a color that will blend in with the surrounding décor. For example, white blends well with white tubs and sinks. If you use it on a glass door or are unsure what will look best, start with clear for the most versatile color and appearance. Almond sealant blends in with colored backgrounds that need a softer sealant color to complement it.

Tip 7: Refresh before you reseal

Contractors understand the unique challenge of removing old sealant. Old sealant can be very stubborn, but you must remove it before applying new sealant, otherwise, you might compromise the seal.

Before jumping into the task, you have one other option to consider.

GE Sealant’s Re-New Cartridge fits conveniently in your caulk gun. It allows you to touch up old spots, even with old caulk still in the area, without fully resealing the bathroom.

When you take the time to seal a bathroom the right way the first time, it will last longer, look better, and fight mould more efficiently. Following these tips will help you stand out as a contractor, proving to clients that you understand the subtle nuances of applying bathroom sealant.