Note: This DIY article is provided as a general guide only and is not intended to take the place of product-specific installation procedures; always follow applicable manufacturers’ instructions. Depending on your home’s age and condition, location within the home, and other potential factors, repairs and/or upgrades or other services may be necessary prior to the beginning and/or completion of your project that may involve the services of a home improvement professional. This article does not include advice pertaining to local building codes and/or any related inspections.
In home improvement projects, knowing whether to caulk before or after painting is an important part of getting a smooth, professional finish. Which to apply first can depend on the type of caulk used, as some materials—like silicone—typically aren’t paintable. This blog will guide you through the differences between acrylic caulk and silicone sealant and help you choose the right approach for your project.
Understanding caulk and paint compatibility
GE Sealants offers two different formulations. Acrylic caulk is water-based and paintable, making it suitable for interior projects where aesthetics matter. It adheres well to various surfaces and can be painted over once it cures.
Silicone sealant, in contrast, is not paintable due to its chemical properties. As silicone sealant offers excellent flexibility and waterproofing, it is ideal for areas exposed to moisture like bathrooms and kitchens. However, paint does not adhere to silicone sealant, so sealant should be applied after painting. Knowing how these materials interact with paint is essential for achieving a professional finish.
Acrylic caulk is paintable and suited for interior projects, while silicone sealant is non-paintable but highly flexible and waterproof, making it ideal for outdoor projects. For a professional finish, apply acrylic caulk before painting and silicone sealant after painting.
Acrylic caulk: paintable and flexible
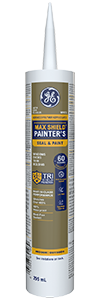
Acrylic caulk is a versatile, paintable sealing option commonly used for interior applications where aesthetics are a priority. It’s a water-based caulk that adheres well to various materials, including wood, drywall, and masonry, making acrylics like Max® Shield Painter’s Pro suitable for sealing gaps around baseboards, trim, windows, and doors.
One of the main advantages of acrylic caulk is that it dries to a firm, paintable finish, allowing it to blend in on painted surfaces. This quality is particularly useful in projects where the caulked areas need to be concealed or matched with the room’s colour scheme.
To apply acrylic caulk, ensure the surface is clean and dry before application. Use a steady bead along the gap, smoothing it with a caulk tool or damp finger to create a uniform surface. Once it’s fully cured—which usually takes 24 hours depending on humidity—you can paint over it for a smooth, professional finish.
Acrylic caulk is also known for its flexibility, which helps it resist cracking and withstand minor movements in the materials it’s applied to. For these reasons, acrylic caulk is an ideal choice for interior finishing projects where both flexibility and colour scheme are important.
Silicone sealant: non-paintable but durable
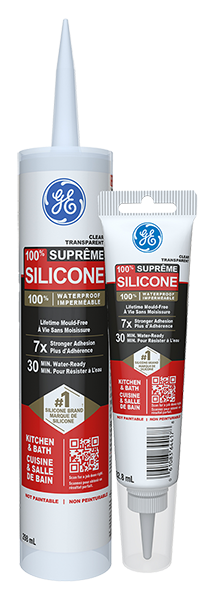
Silicone sealants like Supreme Silicone Kitchen & Bath Sealant are popular for their durability, flexibility, and resistance to moisture and are typically the preferred choice for high-moisture areas like bathrooms, kitchens, and exterior applications. Unlike acrylic caulk, silicone has a non-paintable surface—due to its chemical composition, which tends to repel paint and prevent it from adhering effectively. Silicone sealant’s resistance to chemical bonding after curing can be beneficial in situations where longer-lasting protection against water is desired, but it also means silicone sealant should only be applied after any necessary painting is completed.
The application process for silicone sealant is straightforward but requires attention to detail for a clean result. Begin with a clean, dry surface, as this helps the sealant bond securely and prevents potential leaks. Apply a consistent bead of silicone along the joint, then smooth it with a caulk tool or a damp finger to achieve a uniform, sealed finish. Silicone sealant remains flexible even after curing—allowing it to expand and contract with temperature changes or building movement—reducing the risk of cracks. Its resistance to UV rays and extreme temperatures also makes it ideal for outdoor use. While it may not be paintable, silicone sealant offers reliable protection where long-lasting, moisture-resistant sealing is a priority.
Choosing the right caulk or sealant for different areas of the home
Selecting the appropriate caulk for each part of your home matters for both durability and appearance. Acrylic caulk is ideal for interior spaces like living rooms, bedrooms, and hallways, where moisture levels are low, and paintability is a priority. It adheres well to wood, drywall, and masonry, allowing it to blend seamlessly with painted surfaces for a clean, finished look.
Alternatively, silicone sealant excels in high-moisture areas such as:
- Bathrooms
- Kitchens
- Around exterior windows and doors
Silicone sealant’s waterproof and flexible nature withstands humidity and temperature changes, making it perfect for sealing joints in characteristically wet or outdoor environments. By choosing the correct caulk type, you ensure a long-lasting, professional-quality finish for your home improvement projects.
Maintenance tips for caulked joints
To keep caulked joints looking their best, perform regular maintenance. Inspect joints annually, especially in high-moisture areas like bathrooms and kitchens, where caulk may degrade over time. Look for signs of cracking, peeling, or separation from the surface, which can indicate it’s time to reapply.
For silicone-sealed areas, ensure any cleaning agents are non-abrasive to prevent damaging the sealant. In interior spaces with acrylic caulk, a quick touch-up with matching paint can refresh the look if minor wear appears. Following these simple maintenance steps helps extend the life and appearance of caulked surfaces.
Common mistakes to avoid in caulking and painting
Achieving a smooth, professional caulked finish requires careful technique and attention to detail. A common mistake is not allowing sufficient curing time. Acrylic caulk needs a full 24 hours to dry before painting. Applying paint over silicone sealant is another frequent error, as silicone’s non-paintable surface leads to peeling and uneven results.
Using the wrong caulk for specific environments, such as applying acrylic in wet areas, can lead to early degradation. Finally, avoid applying too thick a bead, as excessive caulk can cause unsightly bulges. Following proper guidelines helps avoid these pitfalls and creates a lasting, professional finish.
To get GE Sealants’ products for your home improvement project, visit these fine retailers.


